11/21 Shop

Art Source: Artfully Walls

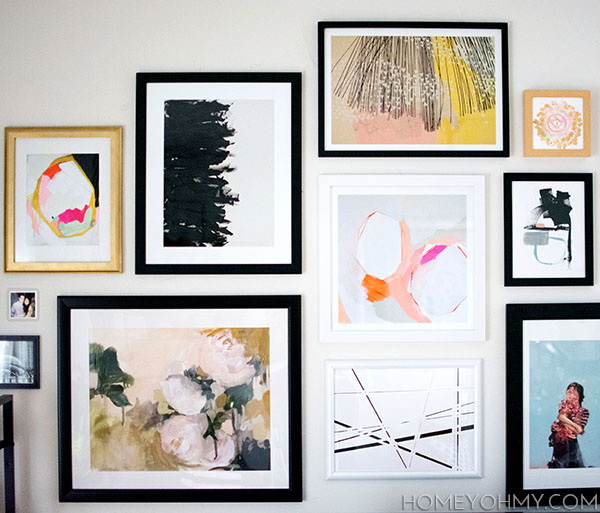
Art Gallery Wall 1I’m signing off on all the gallery wall talk with one final topic, which is about my favorite source for art ever.  If you’ve already seen my gallery wall and looked at the sources, you might have noticed that a good amount of the art is from Artfully Walls which, you guessed it, is my favorite source for art.  Ever.

I first came across Artfully Walls through my obsession with Britt Bass Turner’s work.  All I was looking for was the Navy Geo print, then somehow I got lost in browsing the entire stock of art on the site.  I felt it right away, that there’s something so thoughtful and unique in every piece and in the way collections were curated.  That, in addition to some nifty features, created an experience with art I’ve never had before.  In short, it rocked my world.
Art Source- Artfully Walls

The wall designer is by far the most helpful tool I came across for planning my gallery wall.  It allows you to add any art from the site to a mock wall, choose a frame and mat for each piece, and move the art around so you can figure out an arrangement you like.  I did that here with the art I picked for my wall-
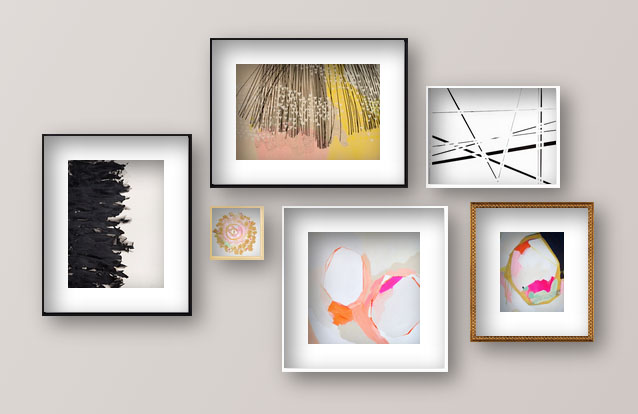
My picksSources:  Divide |  Aurora | Golden Field | Warm Geos | Noose | Navy Geo

Even though my wall wasn’t going to be entirely made up of Artfully Walls pieces, doing this really helped give direction for the rest of my wall.  I also mostly used the wall designer to narrow down my picks because I had way too many favorites.  The mobile app especially helped with this.
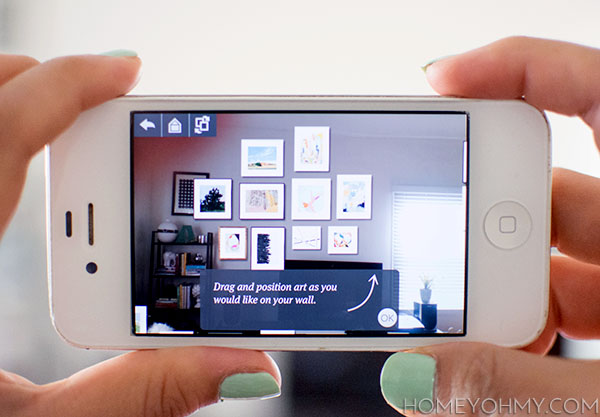
wall designer appLogging in to the mobile app automatically loaded the work I did in the wall designer.  After specifying how far I was standing from the wall, the art appeared on the screen for me to drag around and position, as if it were really on my wall.  So cool, right??  I love it whenever tech and design join forces.

Here’s another wall with some honorable mentions.
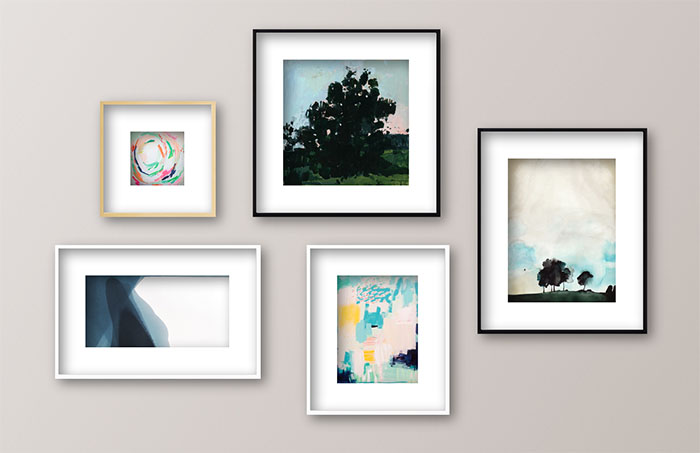
Soft BluesSources: Amy (that name… c’mon, now) | Gust | Bat Watch at Nightfall | Bluebeard | Fragile

My initial plans for my gallery wall included incorporating soft blues, then somewhere along the line that got knocked out by pink, which is so strange for me because I have never considered pink a favorite color of mine.  Still, there’s some pink in some of these pieces and I really dig the way it pairs with blue.

One more wall, this time by Artfully Walls, and I had to share because it’s stunning and in my favorite colors.
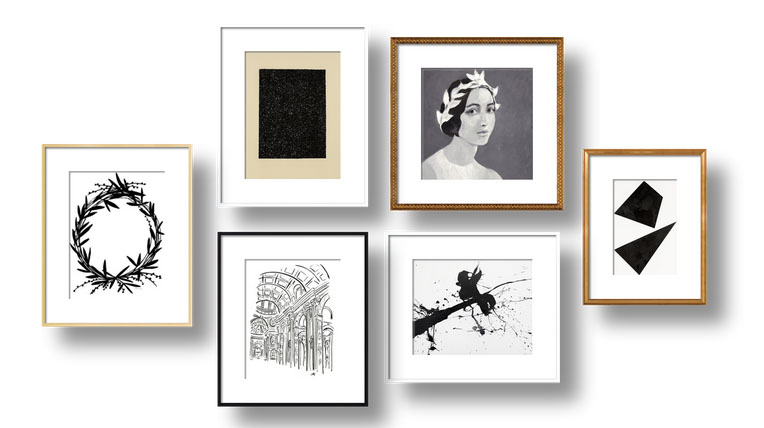
monochromatic melancholy

Sources: Black Wreath | Black Glitter Etching | Grandeur | Young Lady | Splat | Out of Shape

Early on I had also considered going completely black and white with my gallery wall, and it’s walls like these that make me sure I’ll have to do it in the future.  I want all of it!!  These pieces are from a collection recently curated by Michelle Adams, which I also love every single one of her picks.  The theme here, clearly, is that I love everything.

What do you think, guys?  Even if you’re not on the hunt for new art, it’s so much fun just browsing and creating one-of-a-kind digital gallery walls.  Hopefully my idea of a good time isn’t too far off from yours ;).  Give the wall designer a try, and let me know about any favorites you see!


Thanks to Artfully Walls for partnering with me!  Check out more of my favorites in the widget below.

11/19 DIY

How to Plan and Hang a Gallery Wall

Gallery wall-3

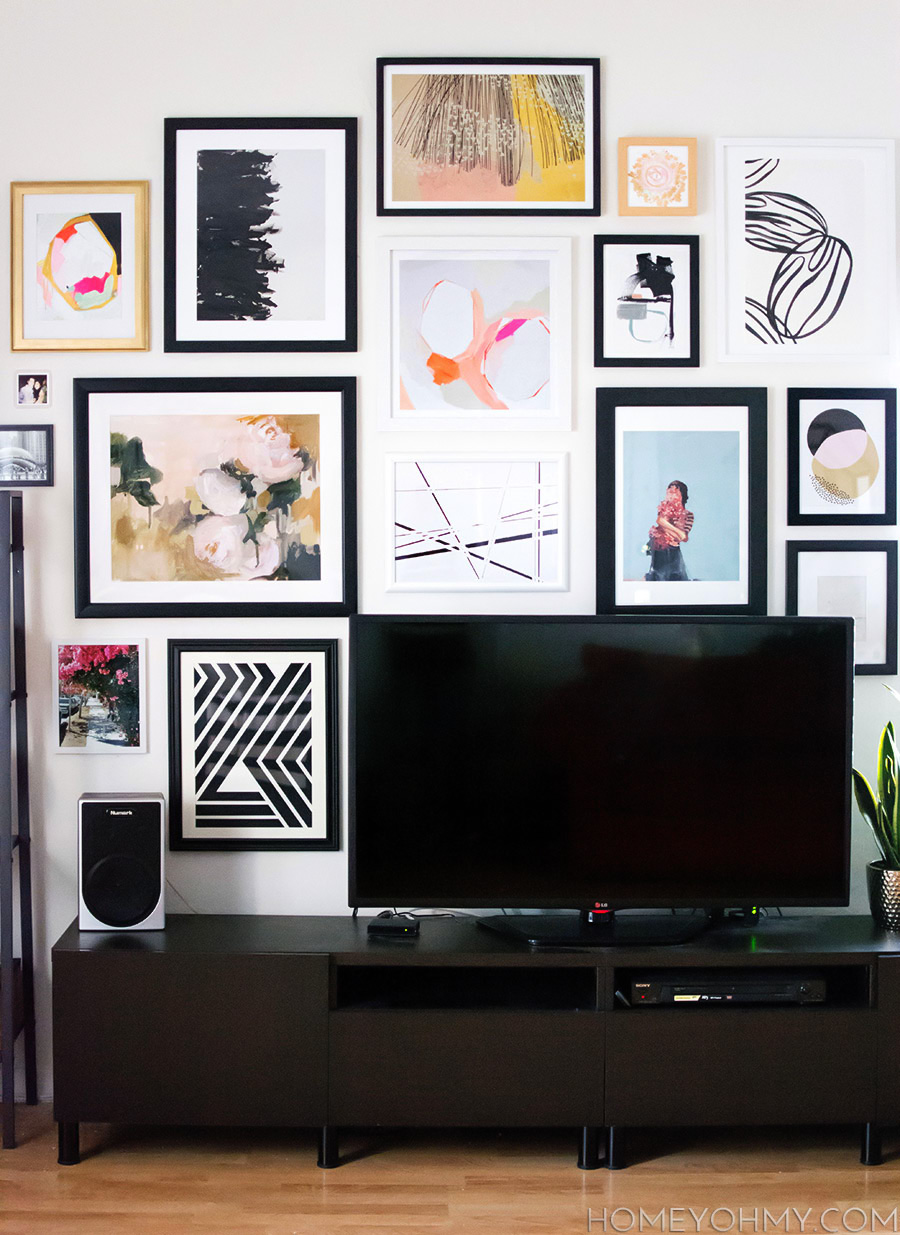
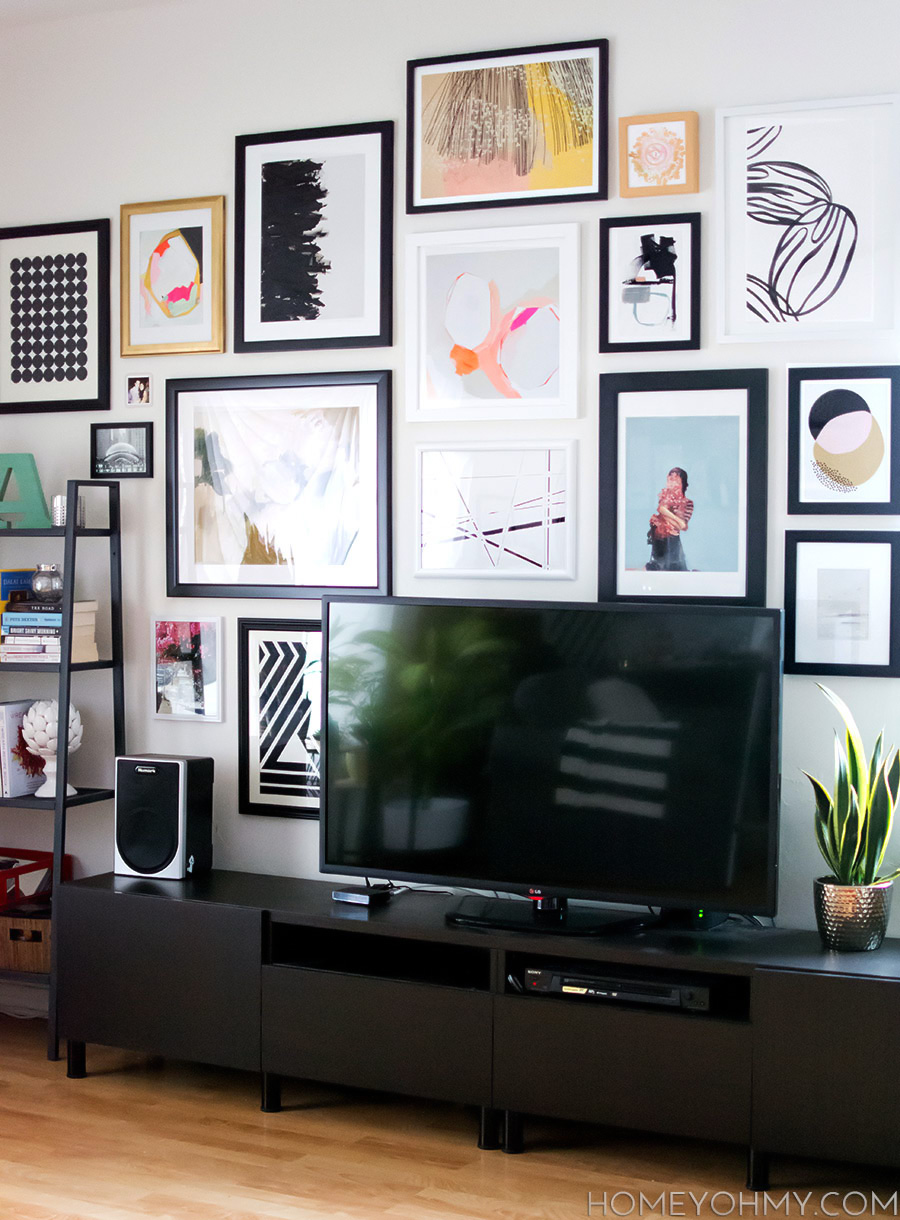
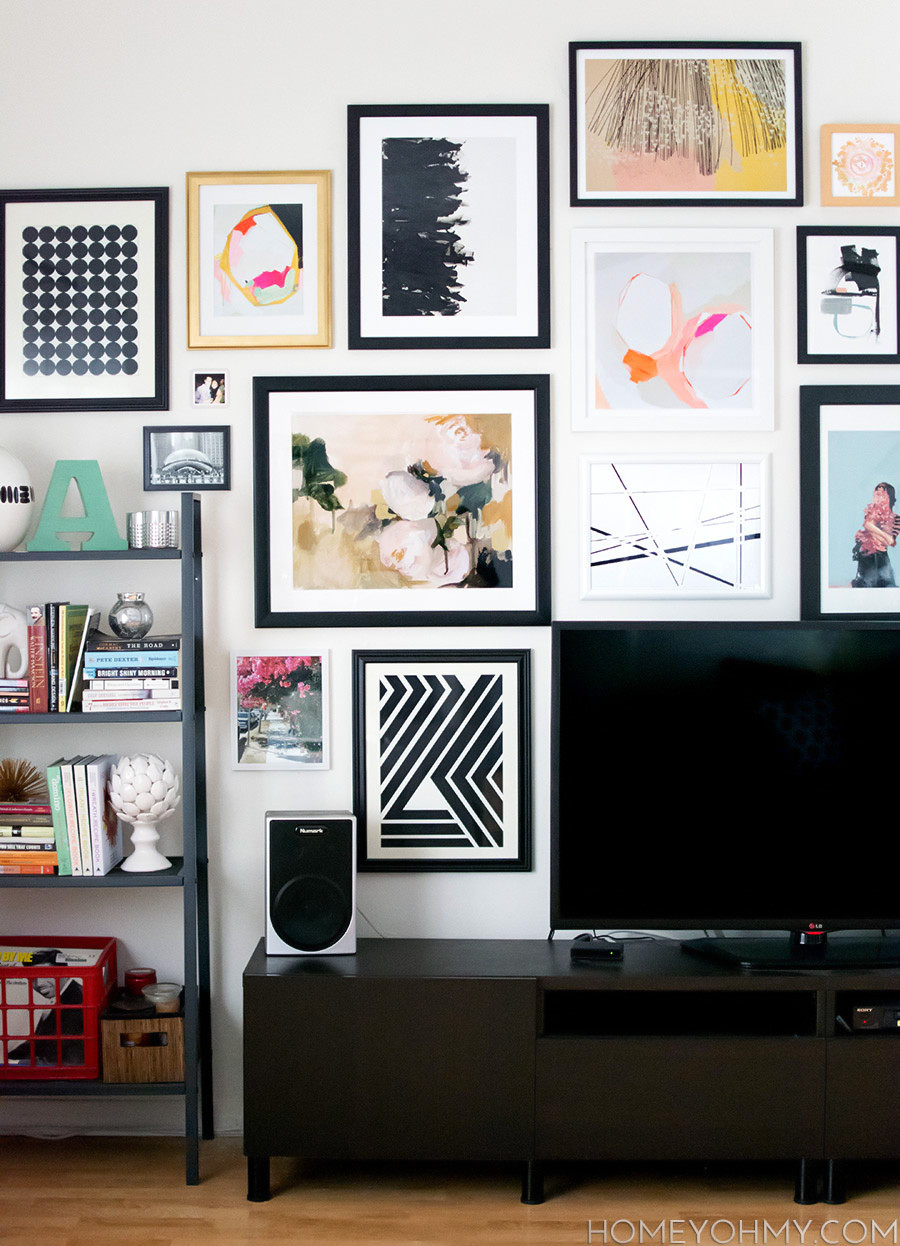
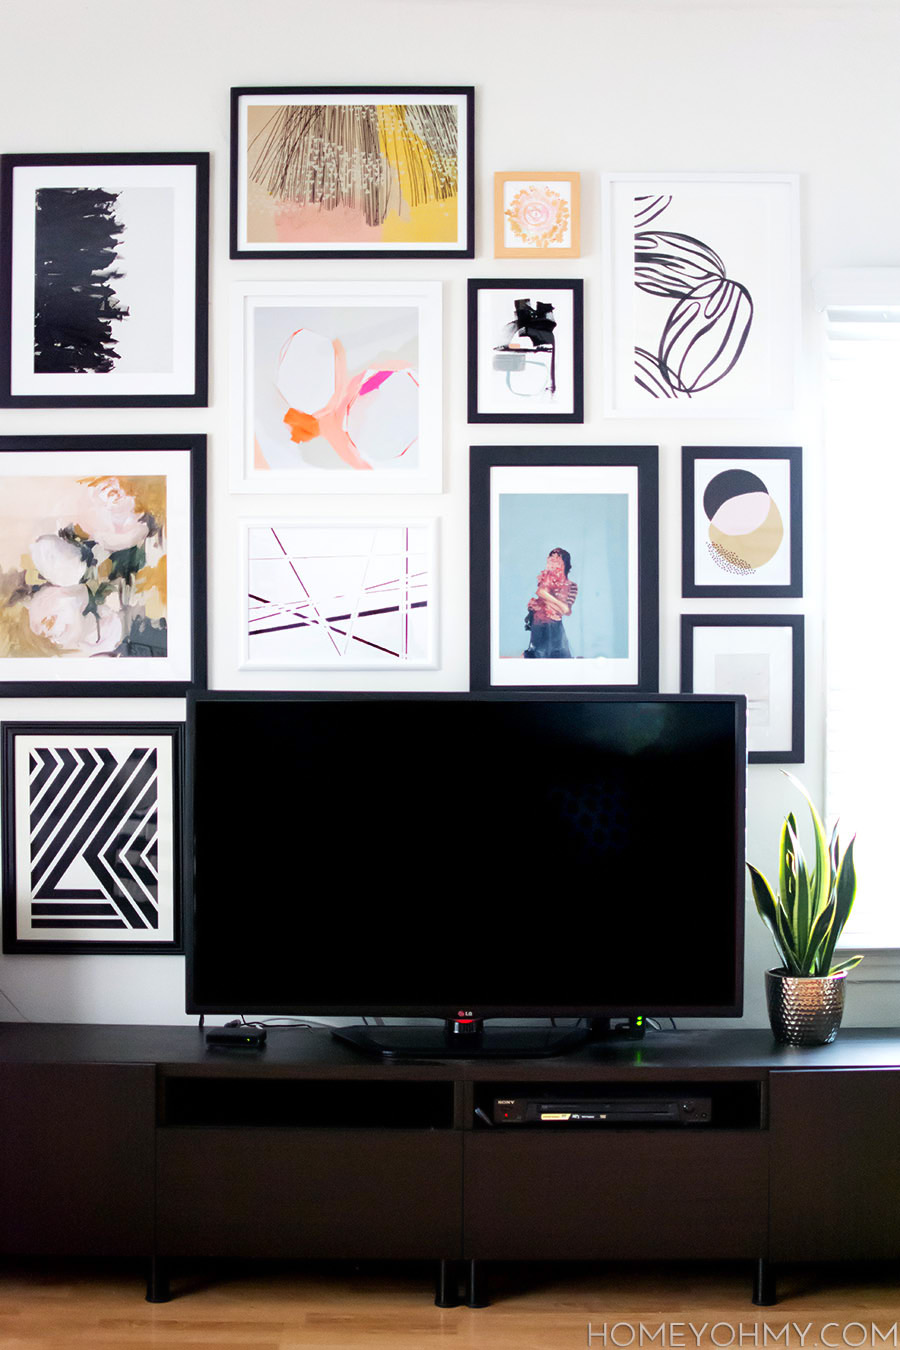
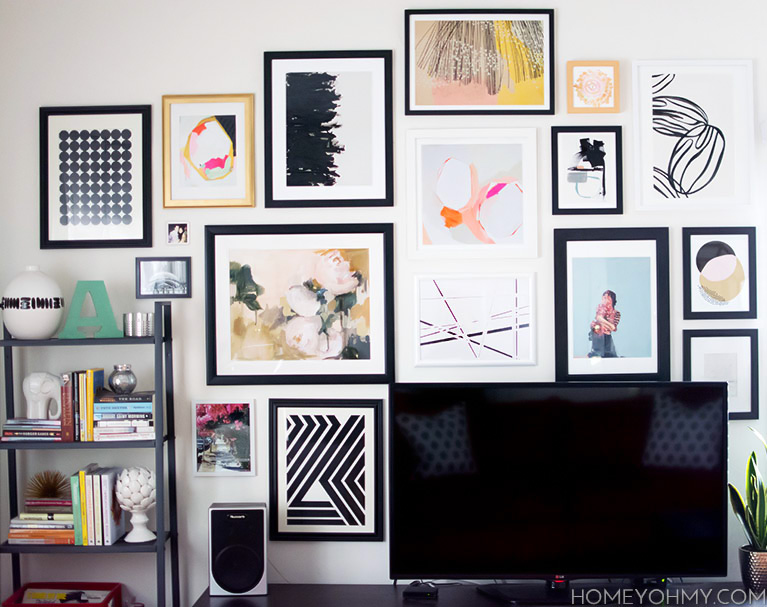
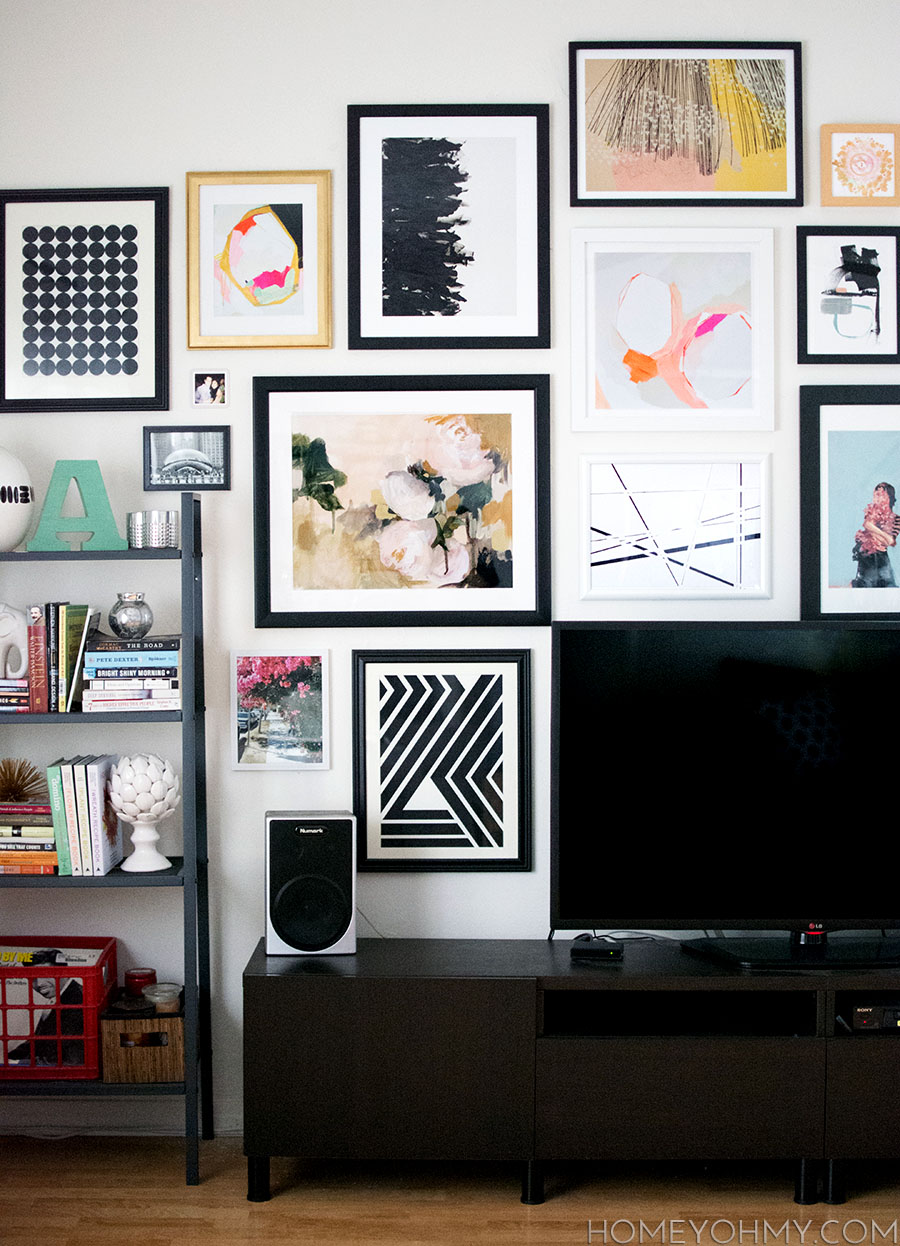
Remember that gallery wall around my TV that I kept talking about for a while and then stopped talking about it for a while… it’s finally here!!!  With it, I’m sharing everything I learned about planning and hanging an art gallery, because I realized… it’s a lot more challenging than I thought.

This is coming from starting with nothing and wanting to create something that looked both collected and edited.  After a year and a half of believing I’d pick up art organically along the way, zero progress was made with that plan, so I changed gears and started pro-actively planning for this wall.

I’ve divided this post up into sections- how I planned, picked the art, framed, and hung everything up.  If you’re not interested in all that and just want to know about sources, that’s all shared at the end!

Let’s get right to it.

Art Gallery Wall-2


PLANNING


By far the most time-consuming part of this project was picking the art.  While art is a very personal thing and something everyone should trust their guts with, I have a few tips on what might help get you there:

  • Study gallery walls and take note of what you like about them– Things like the art mediums, colors, frames, spacing, mats, all are helpful to consider when making decisions on art and the arrangement of the gallery.  I referred to my wall decorating Pinterest board a lot for ideas and inspiration.
  • Pin all the art you’re considering onto an exclusive Pinterest board– This really helped give me a good idea of how all my picks looked together, and from there I could narrow it down visually.
  • Add personal elements- I added a couple photos that I took myself, some just printed from my phone, and I love how they’re like little nuggets of extra personality.  My favorite is the one of my boyfriend hiding behind a bush (yea), which I had shared a while ago on Instagram.
  • Pick art in varying sizes– I had planned on only having art larger than 11″, but when it came time to hang things up, it was clear that I needed smaller pieces to help fill in some gaps in my arrangement, which brings us to the next point:
  • Have more art than you think you’ll need– There were about six pieces that didn’t make it onto this wall, and six pieces that I hadn’t initially planned on that are now a part of this gallery.  Having options to switch things out when something just wasn’t fitting in as I hoped was instrumental for preventing me from having a mental breakdown.  I also now have extra art to put up elsewhere, which I consider a plus!
  • Don’t overthink it– Somewhere I read advice to pick art you know you’ll love at least five years from now, and I think this really messed me up at first.  That’s a lot of pressure, and something that isn’t entirely straightforward to predict.  Once I let go of this idea, it became a lot easier to just listen to my heart.  Pieces that I love a lot right now are good enough for me!

Art Gallery Wall 1-2

Art Gallery Wall 2-2


FRAMING


I do see the value in custom framing, especially for something valuable or sentimental, or if you have a very specific vision for how you want to display your art.  For me though, considering this was a large wall to fill and I’d have more than 10 pieces of art, custom framing was going to take a lot more than I wanted to spend, so my secret was this: Michaels.  I think a lot of us have that same secret.

The majority of my frames are from Michaels, and they’re pretty affordable when on sale, which seems to be all the time.  I also got a few from Target’s Room Essentials line, which I love their frames for being on the thinner side.  I worked with what I could find in the following ways:

  • Spray paint– I came across a frame in the perfect size, but it was only available in black.  I wanted it to be white, so I spray painted it white.  Magic.  Spray paint is the way to go for that perfect frame in the wrong color.
  • Customize photo mats– For those awkwardly sized art prints, I picked a larger frame with a mat that was slightly smaller than the art, then customized the mat size with this tutorial I shared not too long ago.

Kraft paper gallery wall planning


HANGING


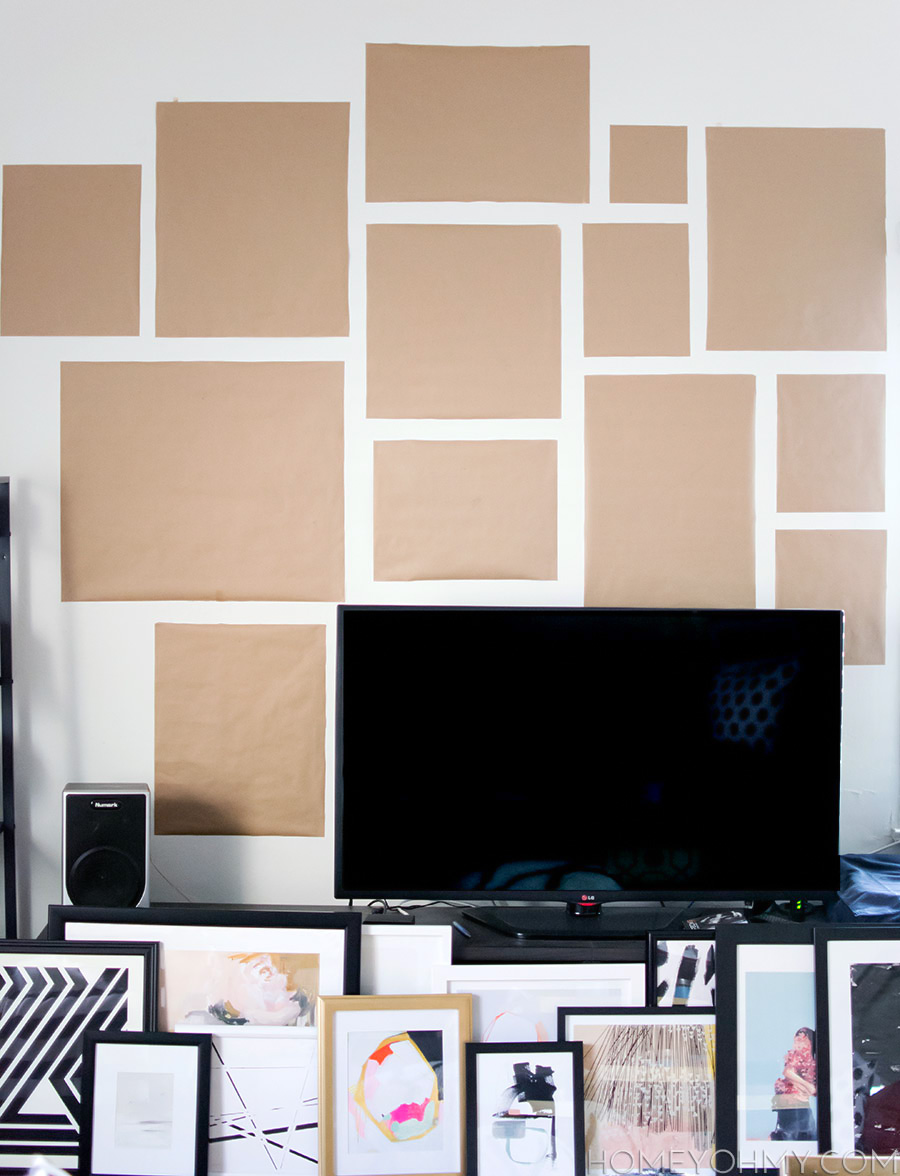
I created a mock-up in photoshop, but it was really difficult trying to size all the pieces to scale and take frames and mats into consideration.  It did help me decide on a rough arrangement, but I definitely needed to create a mock-up right on the wall as well.

Using kraft paper is a very popular, tried and true trick.  One roll from the Dollar Tree was enough for this wall.  I traced each frame onto kraft paper and after cutting it out, lined it up with the back side of the frame to mark in pencil where the hanger was.  Once taped to the wall and arranged, all I had to do was hammer a nail into each pencil marking, rip off all the paper, and hang up the art.


SOURCES


Gallery wall w-2

Everything from the wall, and some sources for you to browse for even more treasures (I included the sizes of the prints I got, which refers to the paper size, not the printed area)


This is for sure the best decorating decision I’ve made with my apartment yet.  It’s been months of art laying around on the floor waiting to be hung, and it feels SO good to finally see it all come together.  My favorite activity now is sitting on my couch and staring at my gallery wall.  Can’t even watch TV because I’m too distracted in the best way possible.

If I missed anything, or you have any questions, leave it in the comments below and I’ll for sure get back to you!

11/17 DIY / Seasonal/Holiday

DIY Merry Sign- Merry Mag

DIY Merry Sign

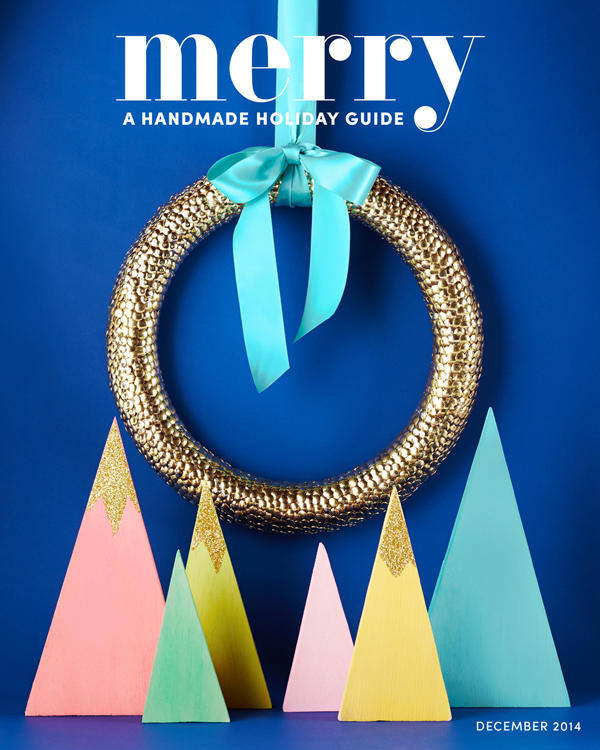
The merry decorating begins, but that’s not all… I had the HUGE honor of contributing this project to the very first issue of Merry Mag, an online holiday lifestyle magazine full of decor ideas, DIY’s, recipes, and style inspiration, all brought to you by some of my favorite bloggers and makers.  It’s as amazing as it sounds, guys.

I’m crazy proud of this magazine, even with just my one little DIY in it, and I’m so grateful that Melissa from the Sweet Escape had me be a part of such an amazing production.  As the mastermind and editor behind Merry Mag, Melissa curated the content and hand-picked contributors to create 98 pages of stunning, holiday splendor.  Take a look and flip through the magazine  (shameless shoutout- I’m on page 33!) at merrymag.com

Merry-Mag-Cover
In case you haven’t gotten lost in the magazine and forgotten that you’re here, I’ll be going on with the how-to for my gold merry sign.

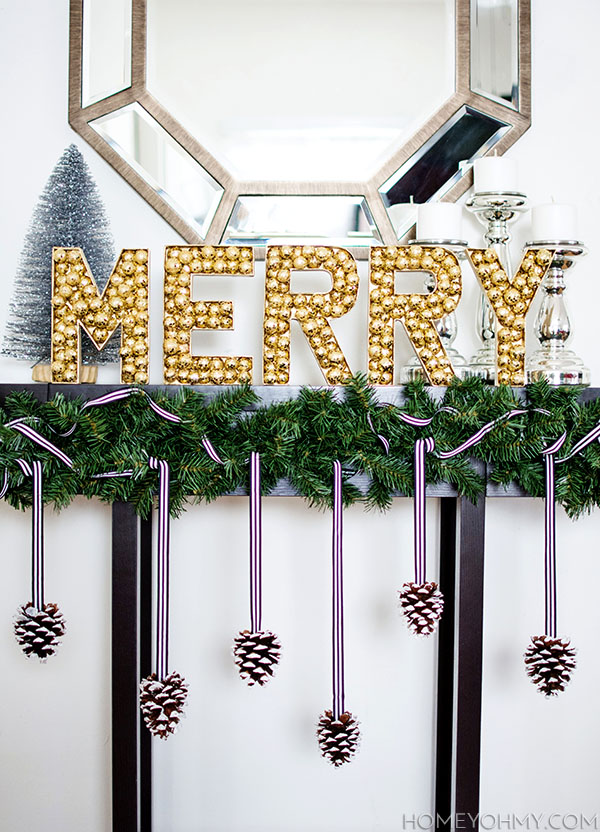
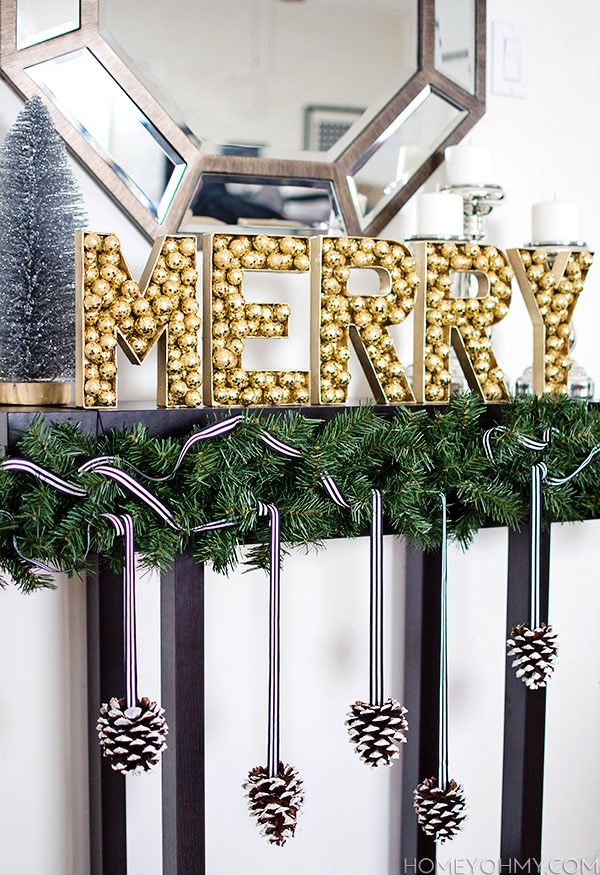
As usual, I pretended that my entryway table is a mantel, which was part of the inspiration for this project.  These letters are perfect for a holiday mantel display, and though I’m not much into the glittery sparkly things for the everyday, I’m not shy about bringing it on for the holidays, so I went for it with this one while keeping it, as always, simple.

Cardboard Letters

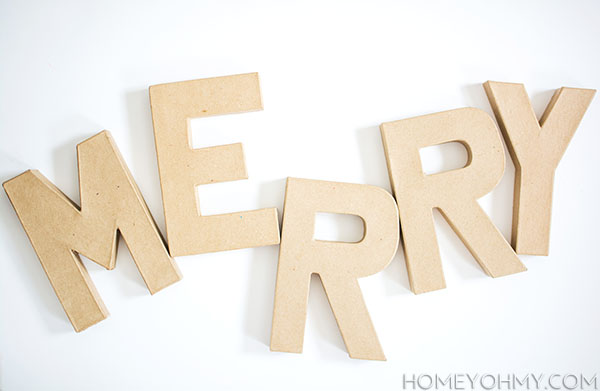
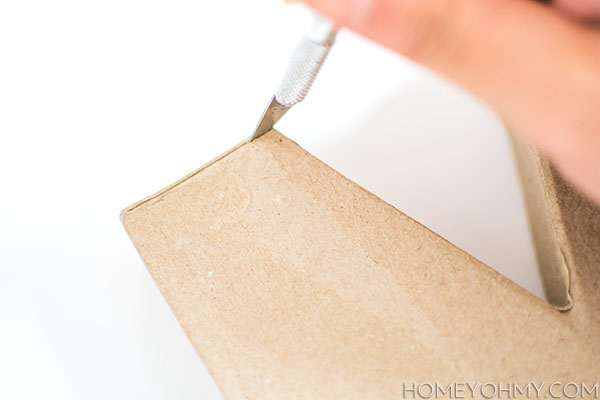
I got these cardboard letters from JoAnn and cut out the front side of each of them with an X-ACTO knife.

Cutting

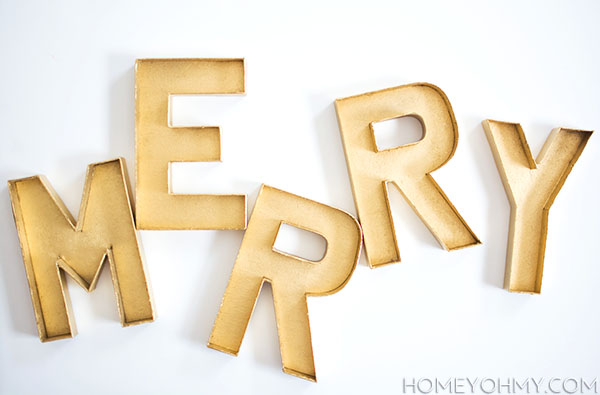
Gold letters

Once cut, I spray painted the inside and outside edges of each letter with this gold spray paint.  This didn’t have to be neat on the insides since I’d be covering them up anyway, but I did take a little more care with painting the outside edges since they’d be more visible.

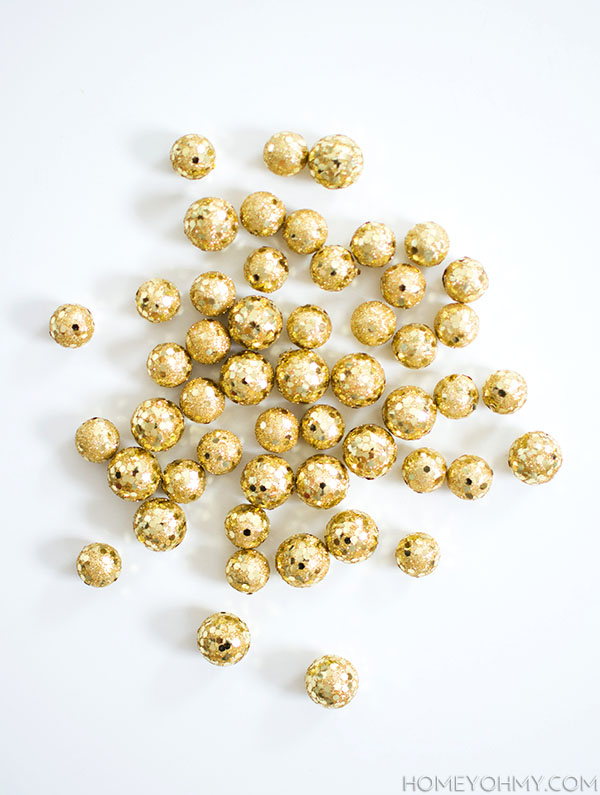
Decorative fillerThe magic of this project is this decorative gold filler, which I found at Michaels.  The way they sparkle and catch the light is gorgeous, and a bit reminiscent of the way marquee signs glow and shine.
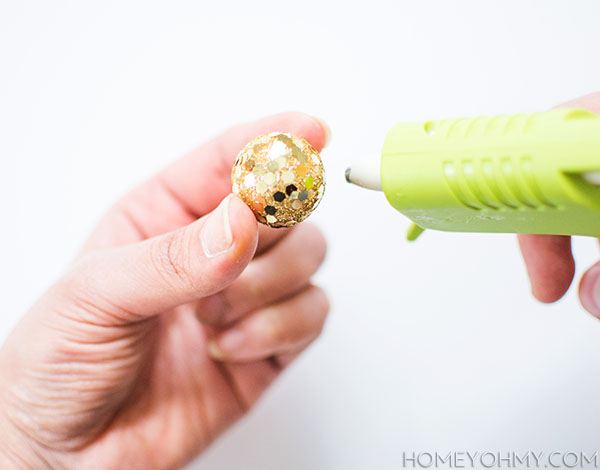
Glue gunI applied a small dab of hot glue to each ball and stuck them inside the letters.
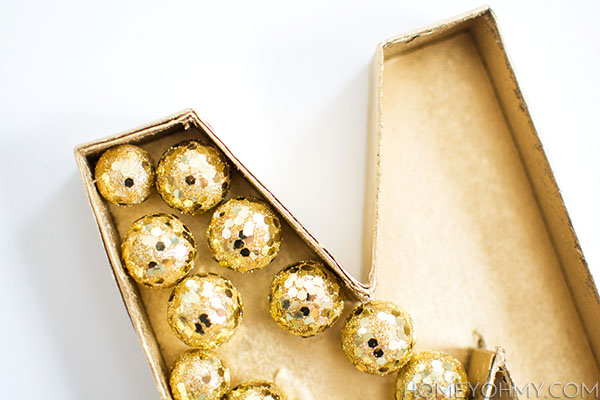
Balls 1I first glued a bottom layer of the filler before adding some on top.
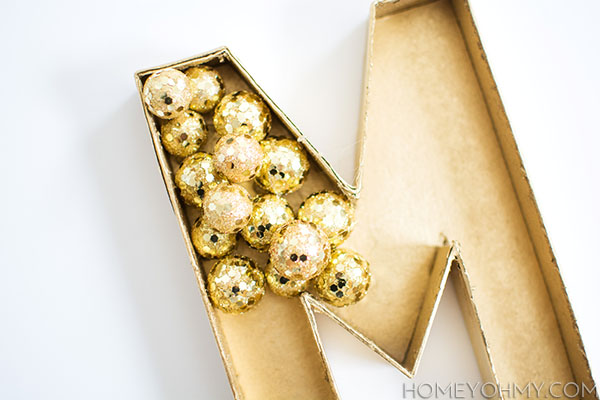
Balls 2Pretty simple process, right?  Especially when considering the huge impact a little cutting, painting, and gluing can make.
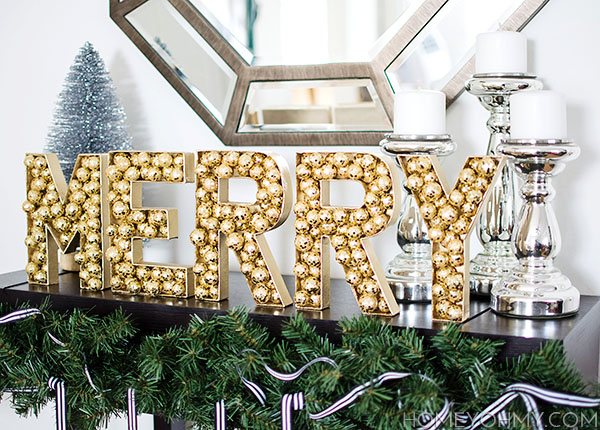
Gold Merry Letters

BONUS STEPS for anyone wondering about the pinecones hanging underneath- it was a last second idea I came up with while styling this display that was SO easy to do that I decided I’d throw in here.

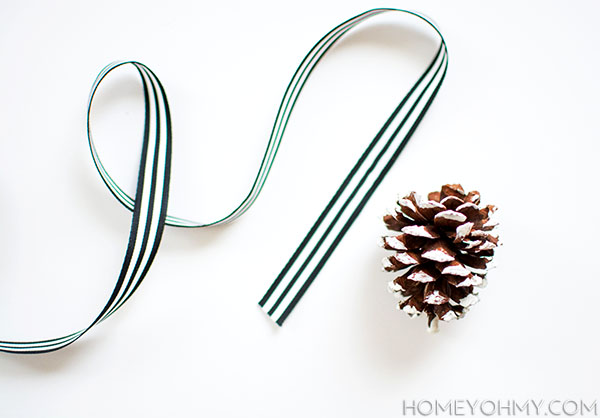
ribbon and pinecone

It’s just ribbon and pine cones, y’all.
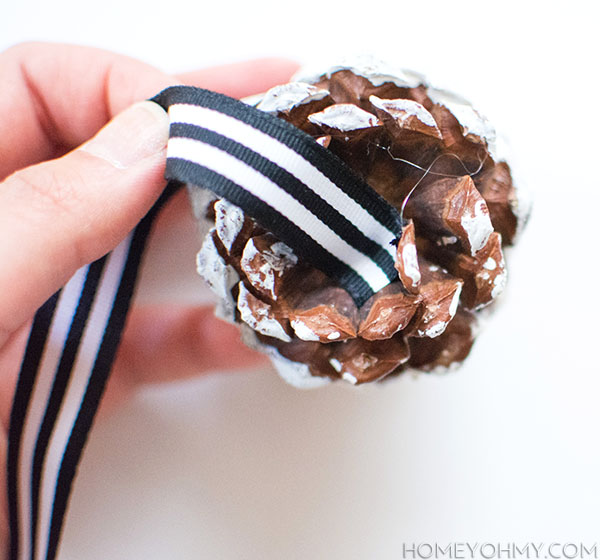
pinecone ribbonUsing a glue gun, I glued the end of each piece of ribbon to the bottom of a pine cone.
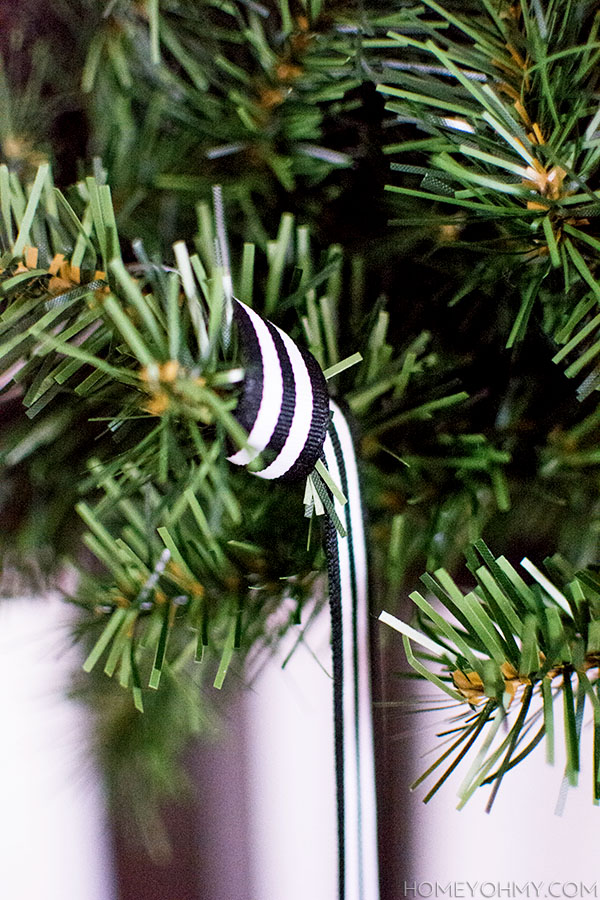
Ribbon wrappedI wrapped the ribbon around the branches of the faux evergreen garland I hung up around the edges of the table, making each pine cone hang at a different length.  I also cut the ribbon in fairly long pieces so that I could weave the excess through the rest of the evergreen garland.
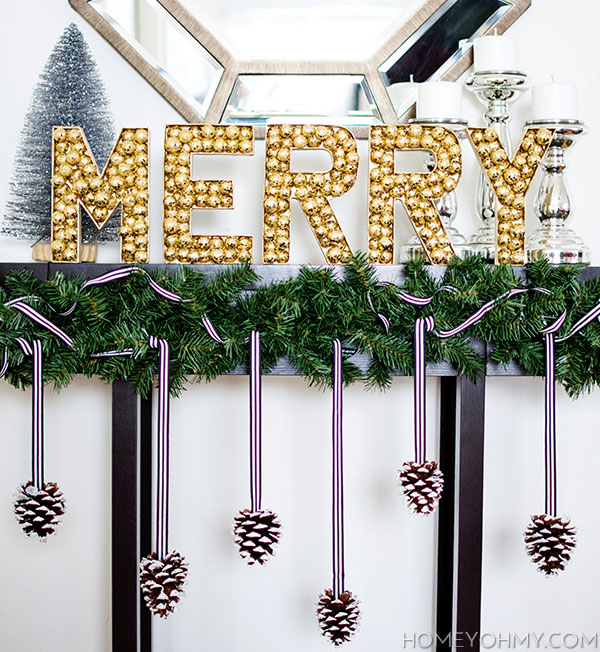
DIY Gold Merry Letters

Merry Gold LettersTis the season of mantel envy as they say (or maybe I just say that?), and this is how I’m coping with not having one, and it ain’t bad!  It makes me so happy and warm to look at it, which is all I wanted other than to add even more gold to my home this season.  I’ve been a little quiet on the gold lately, but it will be making it’s way back with my holiday decorating this time.  Last year was silver- isn’t that weird of me?
If you haven’t made your way over to see Merry Mag, do it now.  Please.  It’s so good and guaranteed to inspire your holiday celebrations and style.  Let me know what you think of it, too!  I’d love to hear if you guys are enjoying it as much as I am.

11/13 DIY / Seasonal/Holiday

DIY Gold Scallop Thanksgiving Garland

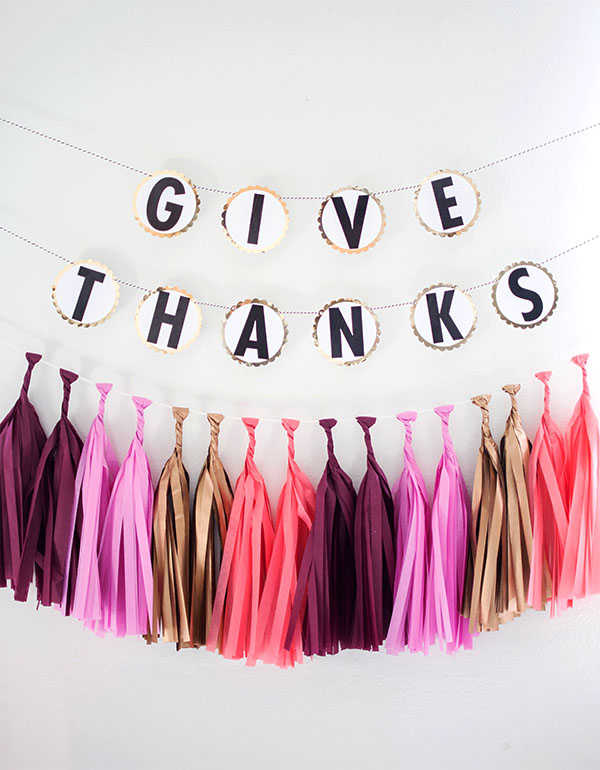
DIY Garland- Give ThanksAs promised in the previous post about my Friendsgiving party decor, the how-to for the “Give Thanks” garland is here, and I’m sharing it at the PBteen Stylehouse today!
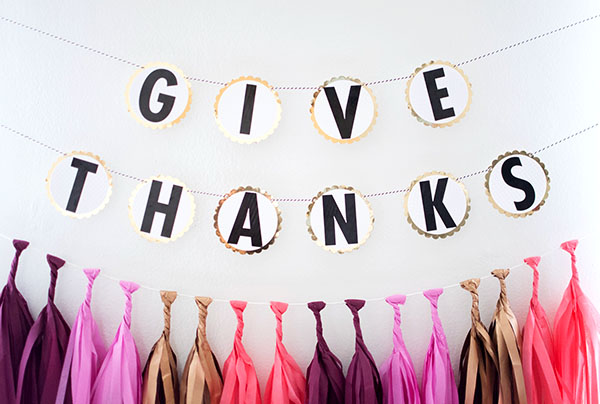
Really simple, black and white, gold, you know the drill.  I went with the idea of creating a gold scallop edge around each letter.  The gold paper I used has a mirror finish, so it’s crazy shiny.  It also helps that I hung the garland between two windows that were letting in so much sunlight it looked like there was an alien spaceship landing going on outside.

Give thanks garland

Give thanks garland

Strung through my favorite black and white baker’s twine and it’s officially adorable.  Check out the step-by-step and details at The Stylehouse!  See you there!


11/10 DIY

Friendsgiving Party with The Flair Exchange

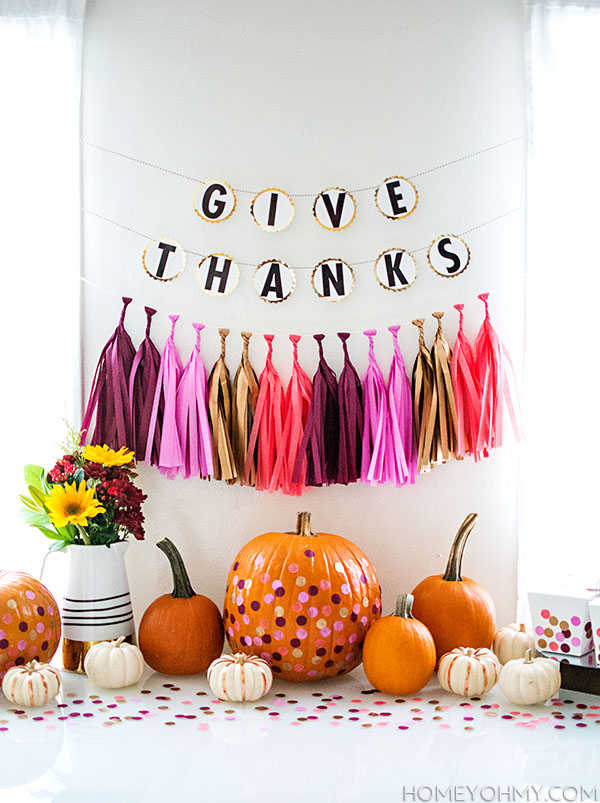
Friendsgiving party decorLast week I showed you guys a formal, fall/Thanksgiving table setting, so this week I’m showing you something a little more casual and more my speed at the moment, meaning buffet style and confetti.  The two go hand-in-hand, of course!
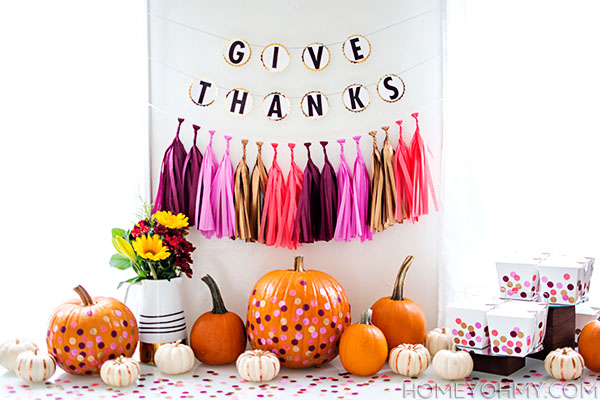
The yearly Friendsgiving tradition lives on, and I’m hosting it this weekend for a few close friends to cook some good eats and dine together in thanks.  I always prefer a more casual gathering, one where everyone can huddle in the living room and get up and walk around as they please, so same as last year I’m setting up our dining table as a buffet for everyone’s culinary creations to be displayed.

Out of raging excitement, I’ve been thinking about how I was going to decorate for this party months in advance, and though I wasn’t immediately sure what I was going to do this year, I knew right away after The Flair Exchange contacted me about using some of their items for a party this season.  You’ve maybe seen their crazy popular Pop Fizz Clink balloons all around the holidays last year, or have pinned something on Pinterest that had one of their tassel garlands displayed in it.  Point is, they have stylish, fuss-free party decor that’s just plain FUN, which is what I want our Friendsgiving celebration to be.

Friendsgiving Table with DIY decor

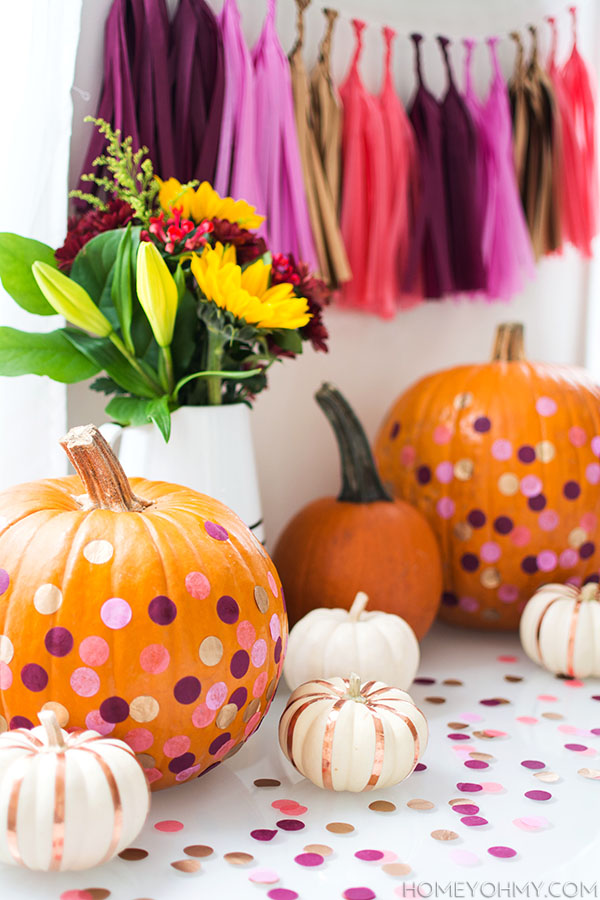
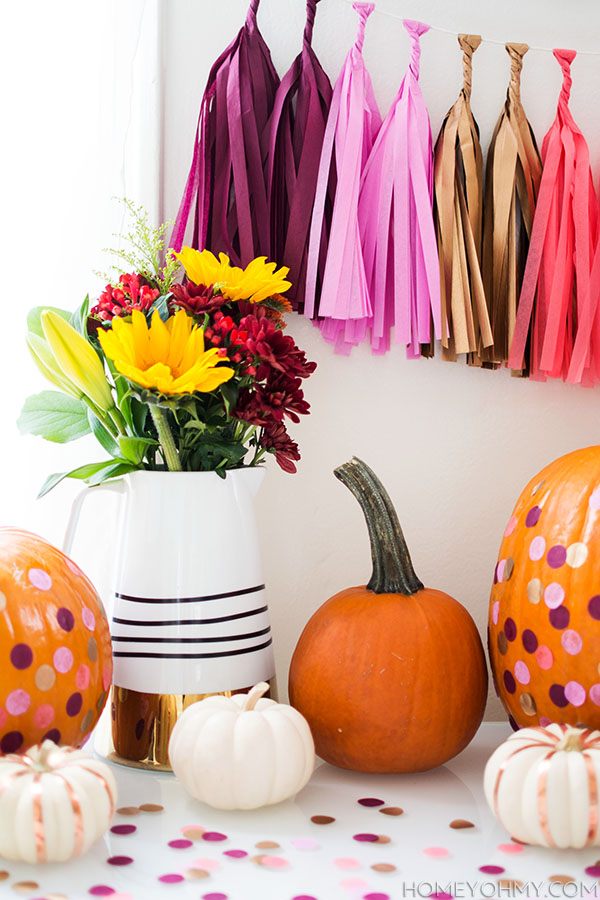
All the decor is at the back end of the table, behind where all the food would go.  This was the perfect opportunity for me to display my pumpkin hoarding skills this season.  I’m proud to have gotten  a lot of mileage out of the mini ones, which you’ve seen the copper striped pumpkins around here a lot recently, so I only really added the orange ones to my collection since, which I’ll get to in a bit.

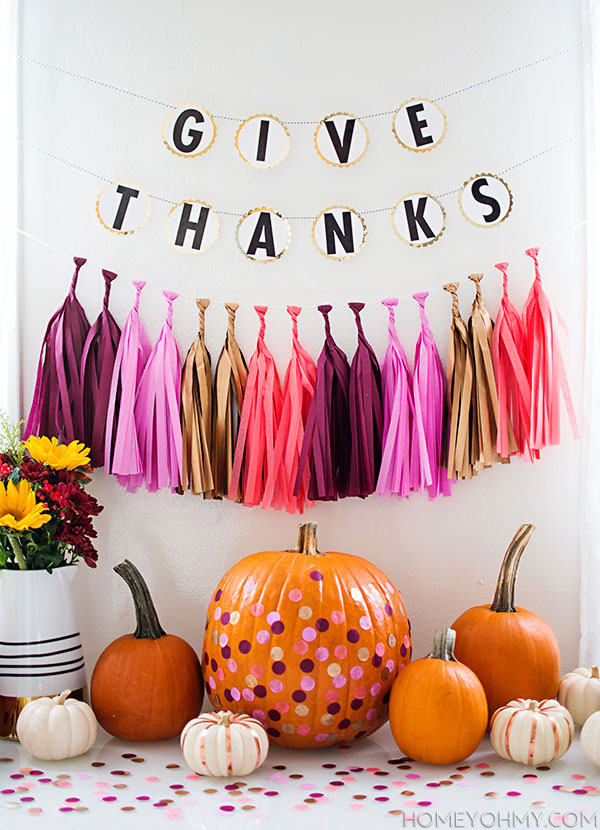
Taking center stage is the tassel garland, which I was most excited about.

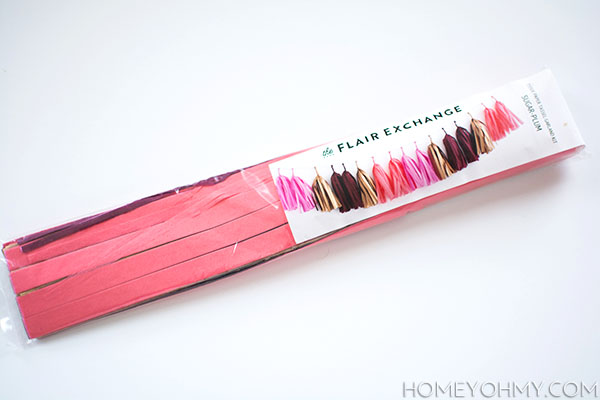
Sugar Plum Tassel GarlandIt came in a compact package like this and contained everything needed.
Sugar Plum Tassel Garland Materials

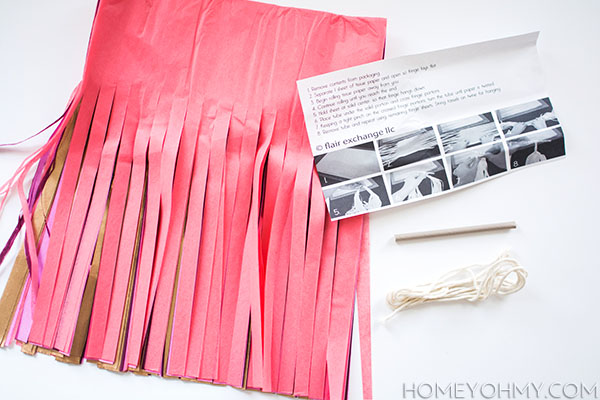
The pre-cut tissue paper, string, a tube for twisting, and instructions on how to make the garland are all included, and therefore SO convenient for someone like me who appreciates not having to go out in search of extra parts or decipher how-to’s from photos of the completed product.  I think you appreciate things like that too, yea?

Friendsgiving partyI went with the Sugar Plum kit because I liked that it was a bit more unexpected for the fall season, but also because I knew the colors would work really nicely with the orange pumpkins I’d display.

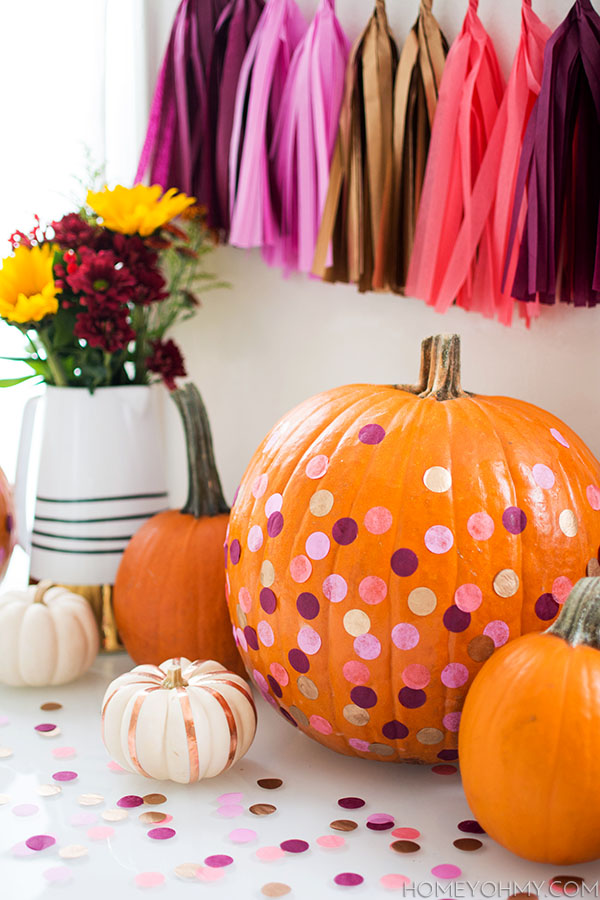
DIY confetti pumpkin

Here’s a small DIY for ya.  With the bigger pumpkins, I decorated them with the Sugar Plum confetti.  All it took was some Mod Podge and patience.  I really did stick on each dot of confetti one by one, and it wasn’t as time-consuming as you’d think, especially because it was fun to do, I swear.  The key was to apply a thin layer of Mod Podge to the pumpkin one small section at a time and work fast before it dried.

Confetti pumpkins

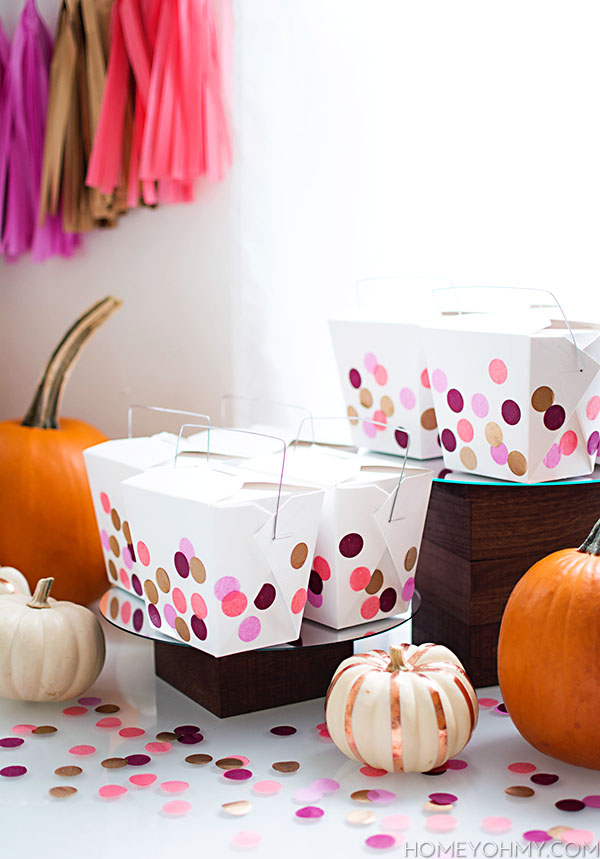
Takeout boxes decorated with confettiIn the same way, I added more of the Sugar Plum confetti to these Chinese takeout boxes for a fun favor that each guest could take leftovers home in.  Last year, we ate so much that some people, who shall not be named, fell asleep and ended up being too tired to pack leftovers.  I’m hoping these will encourage everyone to not leave me with more food than I can eat in a reasonable amount of time.  They’re also just so fun and cute, I had to!

In case you were wondering, they’re resting on top of 10″ mirrors that I placed on the wood pedestals I made not too long ago.

Flowers in a pitcherOf course, there needs to be flowers, so I arranged a simple bouquet in a pitcher.  As my motto goes- when in doubt, flowers.
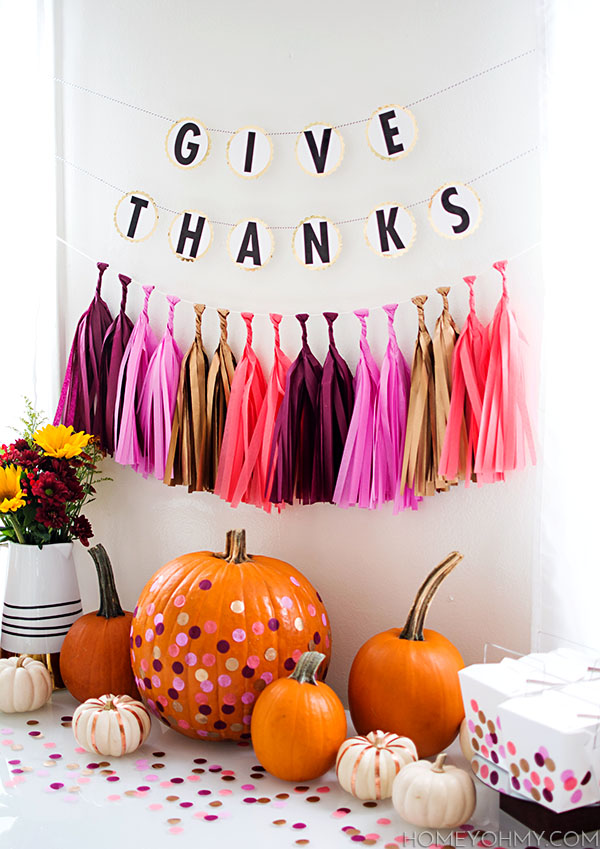
Friendsgiving PartyFor the final touch, I wildly tossed sprinkled some confetti around the table and called it a day.  I’m learning that I can’t not be excited for a party that has confetti.  Really looking forward to this weekend, and I’ll probably be posting about the party on Instagram if you guys want to see how good my friends can cook.

PS.
I did make that “Give Thanks” garland, and that DIY is coming later this week, so be sure to come back here for that one!


This post is sponsored by The Flair Exchange.  I love their unique products, party philosophy, and mission to help the  homemade party planner.  Thank you for supporting the brands that help Homey Oh My! keep on delivering fresh and fun content like this one!  Hope you enjoyed this as much as I did <3.

11/05 DIY

Art Styling Challenge

Bedside table art styling

This is a pretty exciting one, guys.  It was such a fun project to be a part of that I just had to share it with all of you.

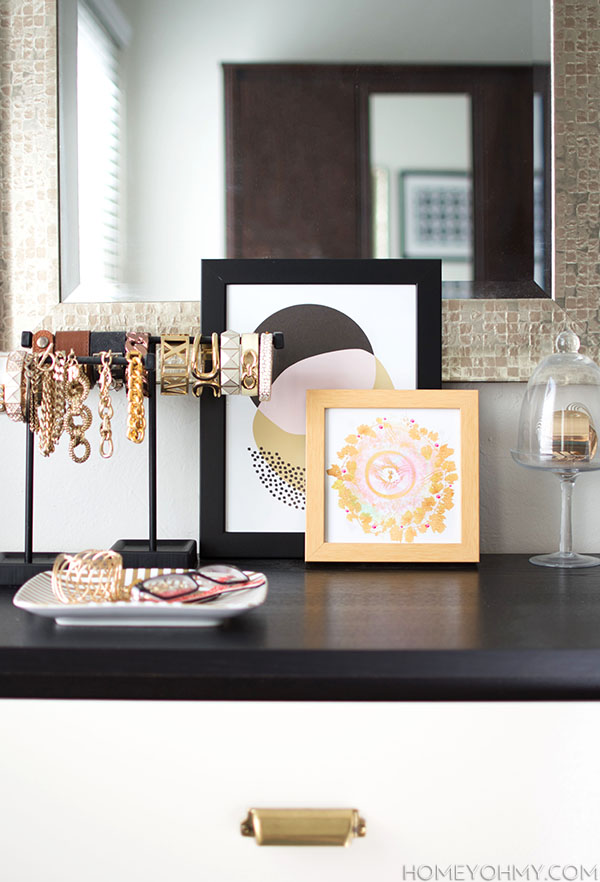
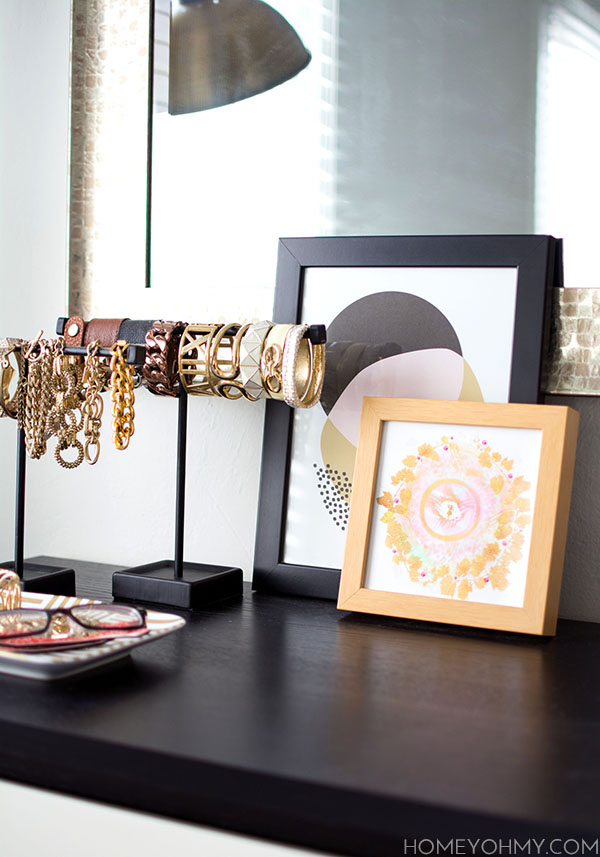
Here’s what went down.  A total of six bloggers were each sent a framed Artfully Walls print from a collection curated by Better Homes and Gardens, and the challenge was to style the print in an unexpected way.  So here I was sent Golden Field by Mira Amir and did a little bedside table styling with it, which is not at all the first thing that comes to mind when I think of styling art, but I knew the print would look perfect in this space!  I’m pleasantly surprised by how it livens up this personal area of mine while still keeping things simple- my favorite.

Bedside table art styling

The mastermind that made this happen is Carrie from Dream Green DIY.  She brought together some amazingly talented bloggers that I myself adore (including Carrie, who’s basically my hero) and compiled all of our work for a feature on 6 Ways to Style Framed Art.  I’m in love with how it all came together and know this is something everyone can find some serious art styling inspiration from, so head on over to see how everyone styled their art here!