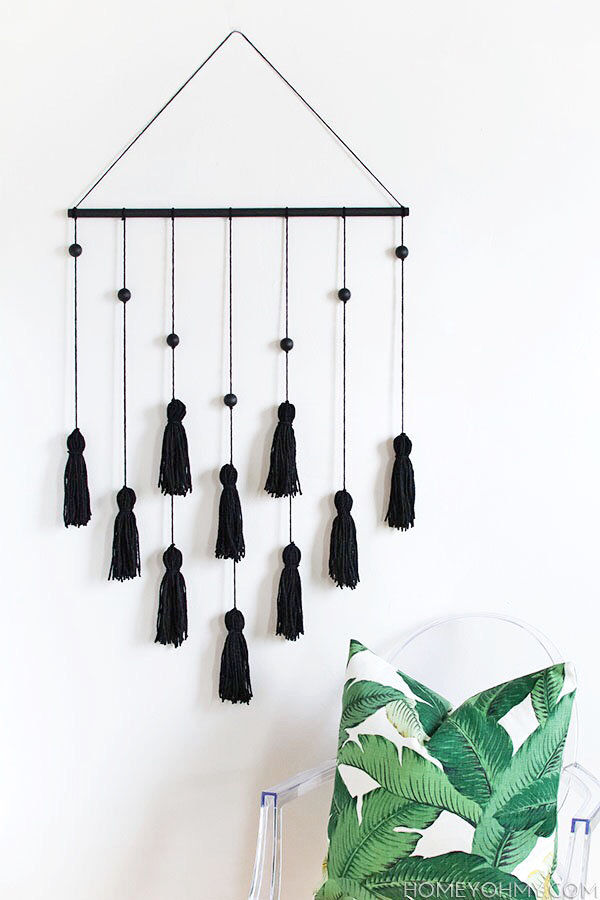
One of my FAQ’s is how I come up with all of my DIY’s, and if it isn’t an idea born out of a need, then most of the time I’m not entirely sure (so boring and unhelpful of me, apologies), but this project reminded me of a huge source of inspiration, one that I enjoy terribly and always wish I had more time for: shopping. Yes to more excuses to shop!
Some kind of idea always comes to me if I walk around window shopping, like maybe I spot a pattern or a color combo I like, and when that recently brought me to a window display full of black tassels, I said black tassels I must make. I loved how the monochrome design looked so chic and modernized a simple idea. The texture of the tassels still bring a summer vibe despite the lack of color, and though this project could easily be done with more colors, I find it so striking and unexpected to do it all in black.
Materials:
wood dowel (0.5″ diameter, 24″ in length)
wood beads
black acrylic paint
foam brush
bamboo skewers.
washi tape
hard cover notebook or book
yarn
super glue
scissors
There’s three parts to this project, all very simple- the beads, the tassels, and the assembly. First the beads:
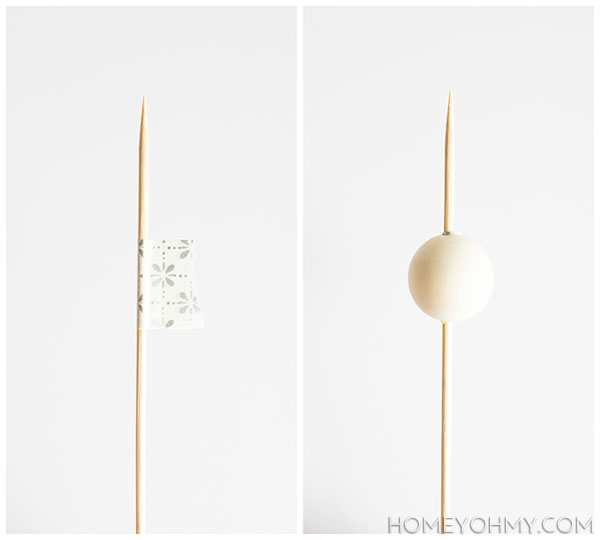 I folded Washi tape into a flag shape on the end of a skewer then slid a wood bead over on top of it to keep it in place. I made seven of these and used a foam brush to paint each bead with black acrylic paint.
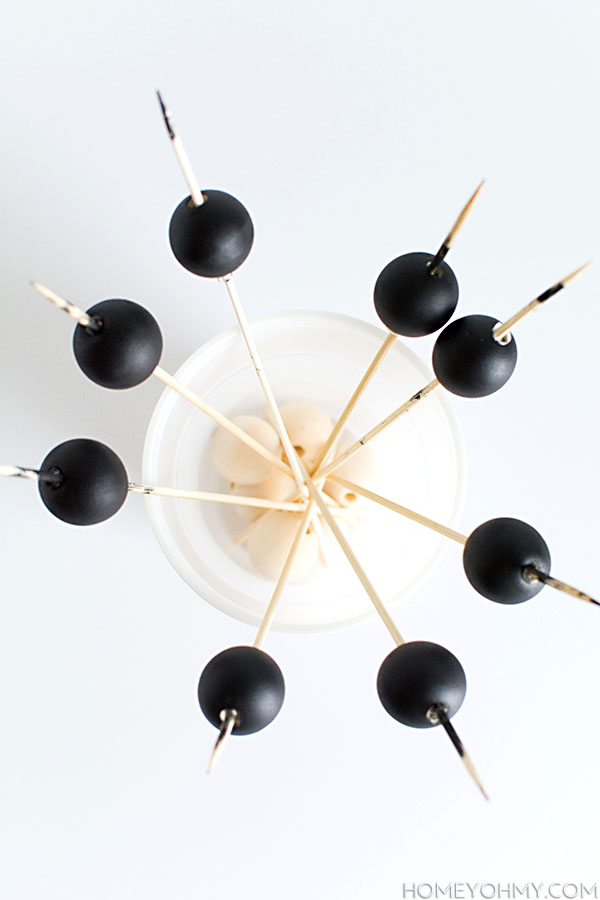 To let the beads dry, I stuck them upright into a cup filled with a few wood beads at the bottom to hold the skewers in place.
For the tassels:
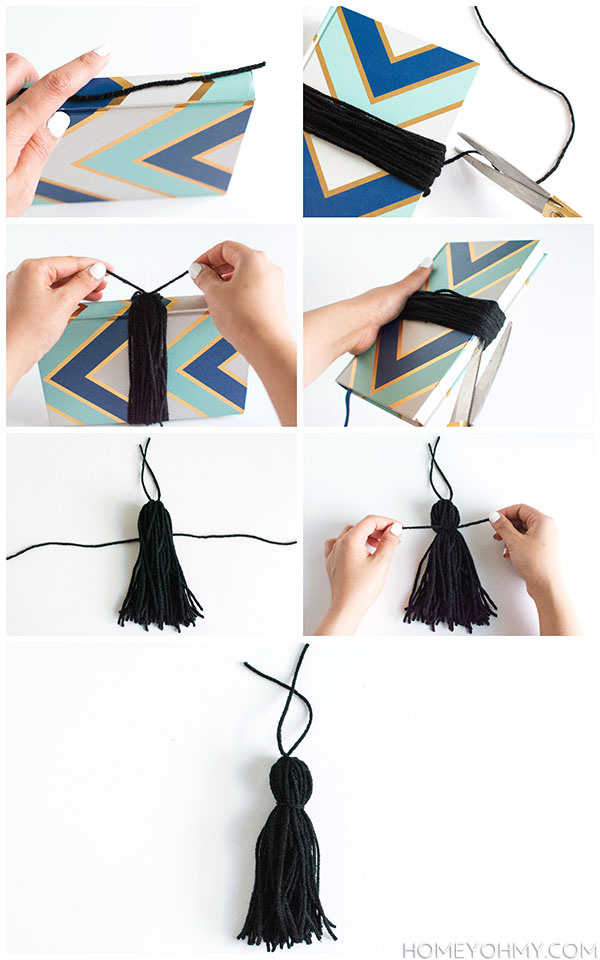 Fun fact- I only use this notebook for making yarn tassels.
1. Start by cutting a piece of yarn and holding it at the spine of the notebook.
2. Wrap yarn over this piece and around the notebook 30 times and cut off the excess.
3. Taking that first piece of yarn at the spine of the notebook, double knot it tightly around the wrapped yarn.
4. Cut the yarn down the side that’s opposite of the notebook spine.
5. Lay the tassel on a piece of yarn, then double knot it to create the head of the tassel.
6. Cut off any scraggly excess ends at the bottom of the tassel.
For the assembly:
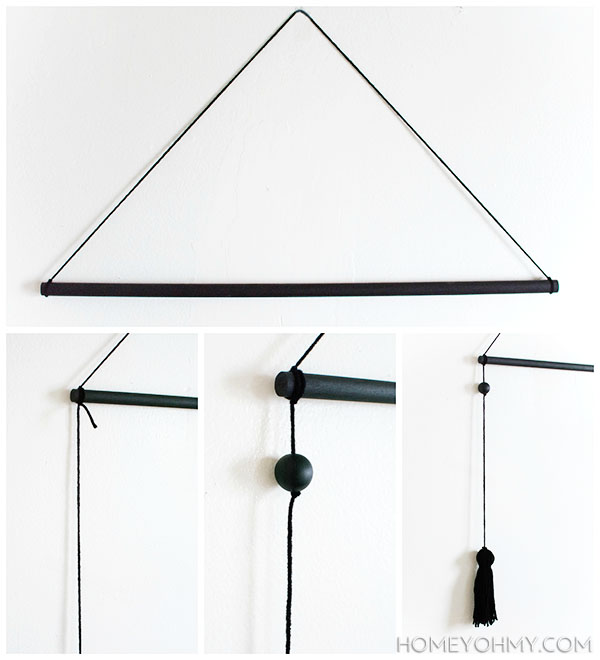 I cut a wood dowel to about 24 inches in length before painting it black with a foam brush and acrylic paint, then tied each end of a piece of yarn to each end of the dowel. With the dowel hanging, I tied on a piece of yarn at the end of the dowel and double knotted it with the knot facing down. From here on out, I reinforced every double knot with a dab of super glue to prevent the knots from slipping out.
I slid a wood bead on to the yarn then triple knotted the yarn underneath it to keep it in place. Next, I tied on a tassel by slipping the end of the yarn through the top loop of the tassel, then double knotted it before cutting off all excess yarn. I did this seven times, evenly spaced along the dowel.
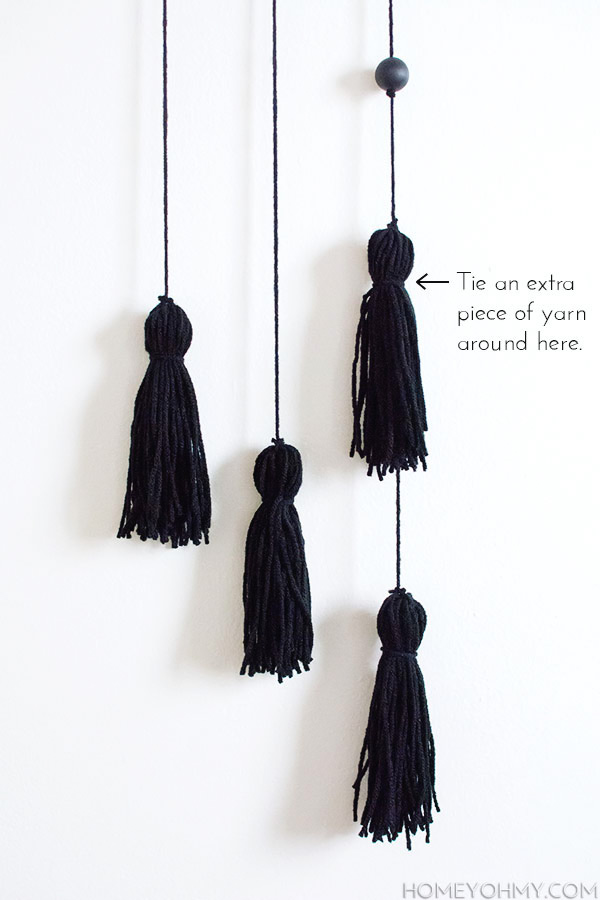 For the middle three hanging yarn pieces, I added a second tassel in between the bead and the tassel hanging at the bottom. I tied it on using the top strands of the tassel that were tied together in step 3 of the tassel making instructions, cutting off the excess after double knotting. I also tied an extra piece of yarn around the bottom of the head of this tassel and the yarn it’s hanging from to better keep it in place.
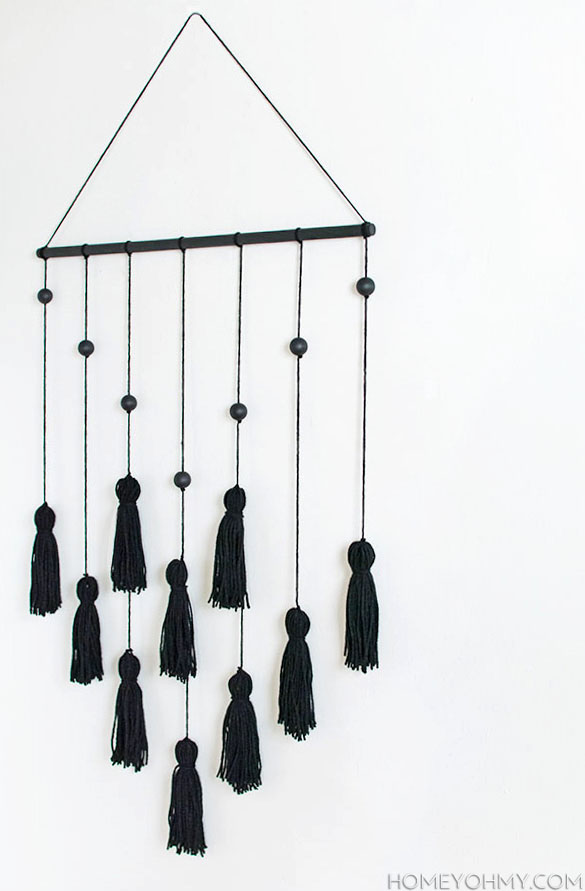
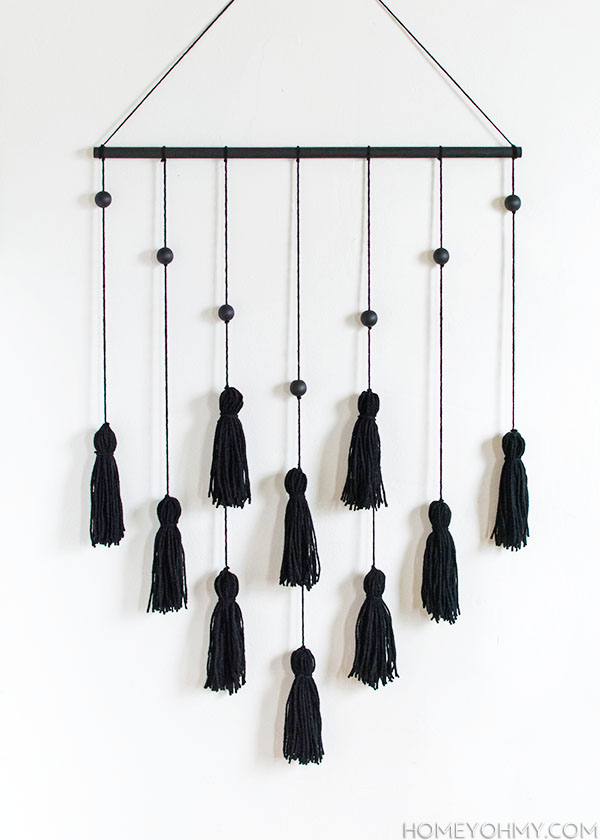
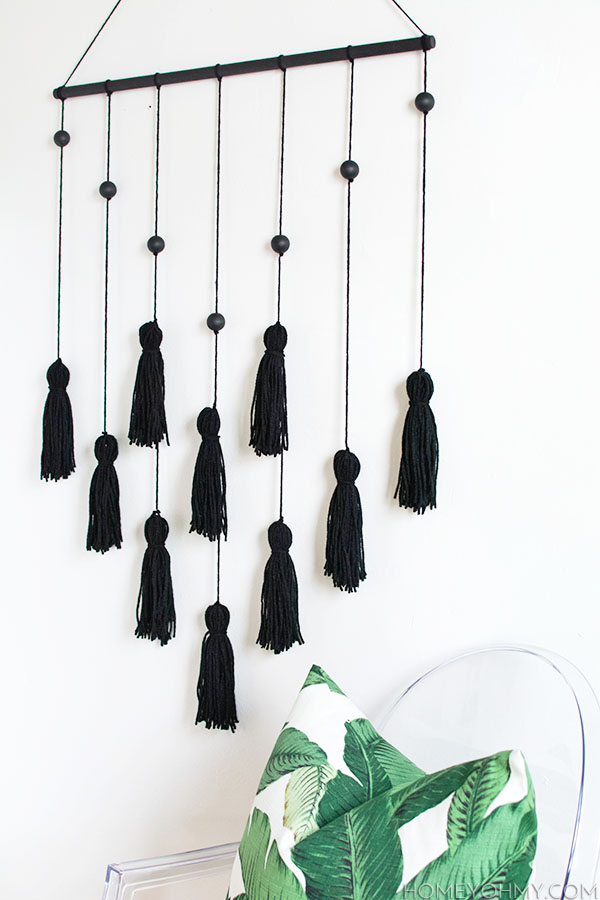 I do plan on using more color this summer, just like last summer, but I had to get this one out of my system, and probably many more like it to come, ha. I always always always come back to black (and white) so sometimes I feel like I should switch it up and branch out, but also maybe it’s just what I should stick to. I think about this a lot for all the redecorating decisions I’ve been trying to make, and a black and white space is something I bet I’m always going to love.
Are you down with the black tassels? Would you do this in different colors?


LOVE IT. Will remember to try in the future.
XX Laura
Thank you, Laura!
Luuuuuuuuuuuhhhhhhhv this! i too am a big fan of black and white….and gold, of course. It’s such a perfect combo with a hint of plum-pink (my current living room). I have 1 boring wall where i know this will look just perfect. Thanks for sharing! :)
Your living room sounds gorgeous! Wish that’s what mine had going on right now.
So happy to give you inspiration for your boring wall :) Thanks, Maria!
I love this Amy! The black looks so chic <3
Thanks, Steph! Chic is what I like ;)
super super cute! Pinned :) xo
Thanks so much, Kristin!
Loving this so much. Thinking I need to make one of these in pink for my daughter’s room! xo
Oh how cute! That’s going to be so much fun to make!
I love this so much! I am totally into the monochromatic look for this project. Might have to make one myself. Thanks for sharing. :)
xx Hannah // TheCheapishly.com
Yay! Thanks for the thumbs up on the monochrome :) Hope you’ll give it a try!
I love this, Amy!
Thank you, Brynne!
So simple and chic! Love :)
Thank you so much Bre <3
I LOVE this! I have this thing for wall hangings but I don’t have any on my walls…yet. :) I host a blog party every Sunday night and I’d love for you to come share this! Have a wonderful rest of the week!
Thank you Chelc! I for sure have a thing for wall hangings and this is the first one I’ve put up :P
I love this! What size wooden dowel should I use? I’m a crafting newbie!
Hi Danielle! Oof, I really should have included that info in the post. Thanks for asking! It’s a 0.5″ in diameter, and I cut it to 24″ in length. Can’t remember what the original length was, but you can of course use or cut to any length that fits in your space. Welcome to the wonderful world of crafting :)
This is absolutely beautiful! I adore the minimalism and I really appreciate hearing about how you were inspired. Your DIY projects always make me smile, love reading about them. :) xoxo, Sam.
Aw Sam! Really appreciate you reading. Whatever I can do to make you smile makes me smile :)
Love this idea, shared it on my facebook: https://www.facebook.com/CurlyMade
Thank you so much for sharing, Daniela!!
I love all of your diys! Could you do a post on photography tips? I would love to learn how you keep you lighting consistent.
Thank you so much, Andrea! Yes, I’ve been putting off doing a post on that for too long now. I’ll work on it!
completely obsessed with this DIY. Can’t wait to try it. Awesome blog too.
Sam
http://www.thehipkidblog.com
Totally making this for my friend for her birthday! Thanks for this post.
I made one yesterday and am very happy with the result! I left the beads and wood natural and used blue yarn so it compliments my bedroom. It looks great. Will be making one in all black for our living room too. Thanks for the great tutorial. I have left the picture link from my instagram in the url if you want to check it out.
This looks super cool and easy. Maybe I’ll give it a shot.
I just made this and it turned out so cute!!! Thanks for the great idea. Can’t wait to try some of your other projects!
Love this! Super chic and minimalistic looking. I’d love to recreate this project and was wondering what type of yarn you used? It looks less fluffy and more silky or slinky than the yarn I have at home.
Thank you, Sara! I used a regular wool yarn. Unfortunately I no longer have the info on the specific brand/color.
This is gorgeous!!! I’ve been looking to do something like this for my bedroom. This one may be my favorite so far! Thanks for sharing <3
I’m am definitely going to attempt making this for my living room! Thank you!
This is great! What type of knots did u use?
Nagyon kreatív!
Jól mutat a szobámba!
:)
coooolllllllllllllllllllllllllllllll
How long is the finished project? Making one gov my daughter’s new apartment! Thx!
simple and bohemian style, i love it! Perfect, thanks ;)
Merci beaucoup, Amy !!! Je vais sûrement le faire mais je trouve les explications pas très claires.
Merci quand même.
I love this so much!!! What length were the yarn strings that you attached the tassels to? How’d you measure where the beads are placed?
OMG, I can’t wait to make this. It will go perfect in my living room!
This is awesome! Will it work without wooden beads??
Thanks
Yes! The beads are only decorative and definitely optional.
Hi! I am not a fiber crafts person, but I thought I’d get a jump on Christmas by trying to make this! So far, it is turning out beautiful. I’m using multicolored yarn for a boho look, and I wanted to share a few tips from a first-timer (more experienced folks probably already have all this down pat). If you’re having trouble keeping the yarn on the spine in place, a little bit of tape does a wonderful job and is easy enough to remove when you’re done with the tassle. Also, thicker yarn = bigger tassles, so if that’s what you’re going for, awesome!
I love this soooo much thanks for sharing
Thanks so much my friend loves this cute project! I’m going to make one for myself later :)
Wohh exactly what I was searching for, appreciate it for posting. <a