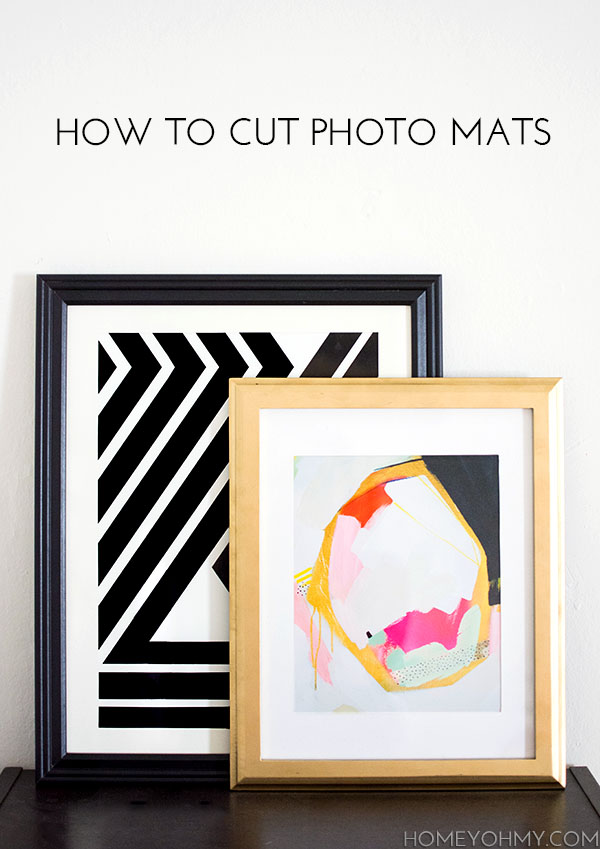
Hey guys! So this post is pretty impromptu, meaning I for real had no initial plans on sharing this on the blog. It only really worked out because I do this thing where I will take “before and after” photos with my camera of little things I work on here and there just for my own fun. What, no one else does that??
I’ll give you more of the story. If you’ve been following along recently, then you know that I’m working on putting up an art gallery around my TV, which is taking forever. I’ve been mostly frustrated over constantly changing my mind about everything, but even more frustrating is a problem I don’t think I’ve ever realized before, and that is this- photo mats covering up too much of the art. Does that bug anyone else?
I want to see every single centimeter of the art print I worked so hard at picking out (humor me) and get the biggest bang for my buck, you know what I mean? So after quickly learning that there isn’t a large variety of stock mat sizes, and that I’m not about to give up yet and go get custom framing done, I set out to customize the sizes of the mats in my frames.
So I took out my camera, snapped a “before” shot of my print in the frame, did my crafty thing with cutting the photo mat to the right size, then took an “after” photo to prove to myself that this was a good idea. And this is what I found:
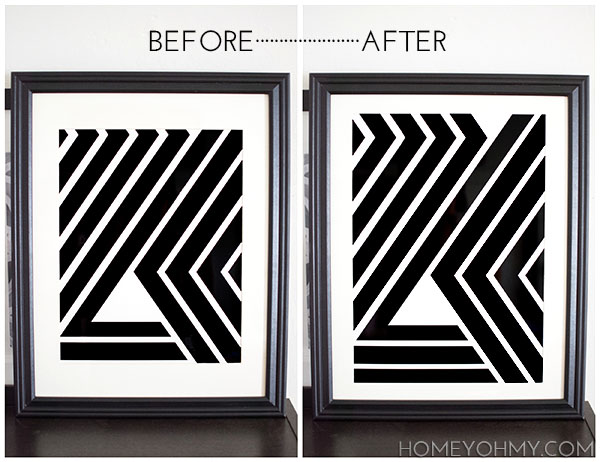 Major difference, right? Would you agree with me that the “after” frame is more badass?
After this epiphany, I decided yes, I want to share this with anyone who feels as passionately as I do about seeing ALL of the art. So as I went ahead to do this again with another photo mat, I had my camera ready to photograph the process. Yay! I barely escaped a blogger fail this time.
The process is very simple and very straightforward. Not a ton to show, but here’s what I did.
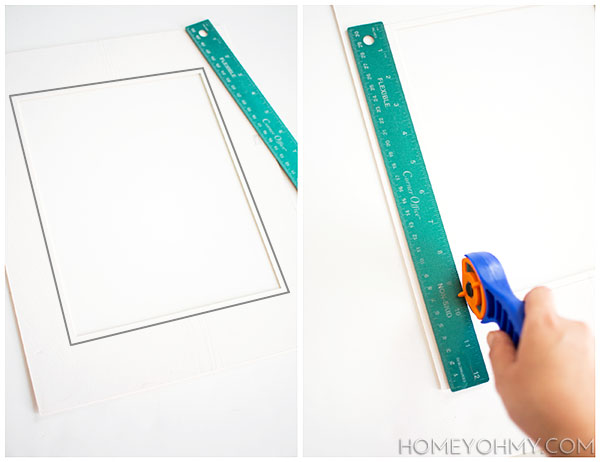 Using a ruler, I measured out how big I wanted the mat opening to be. I get that it’s easier to frame a print if the mat opening is smaller than the printed area of the art, but I measured my opening pretty much to the exact size of my art print, maybe a couple millimeters smaller on each edge (I’m serious about this business!). I bolded this outline in gray above, which I drew in pencil on the back side of the mat.
With a rotary cutter, I cut down the lines using a ruler as a guide for straight cutting. I did this on top of a cutting mat by the way, which I’m pretending to do in the photo above. This cutter is amazing, and I only regret that I didn’t get one sooner as I think about all those times this thing could have made my life easier. It’s for sure my favorite craft tool right now.
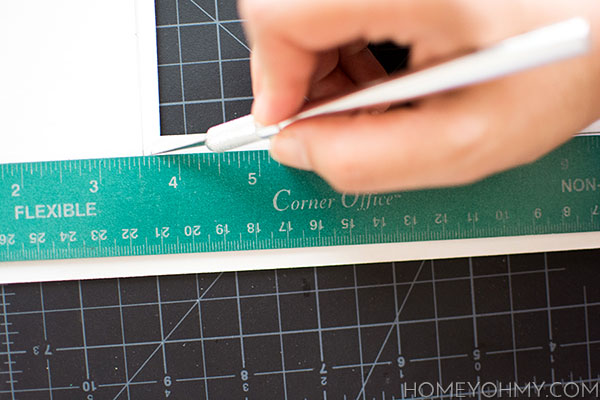
Thing is, cutting corners is tricky with a rotary cutter since it’s hard to decipher how far you have to roll it, so I cut as far along the line as I could, then finished the corners with an X-Acto knife and ruler.
Here’s the before and after for the second mat I cut.
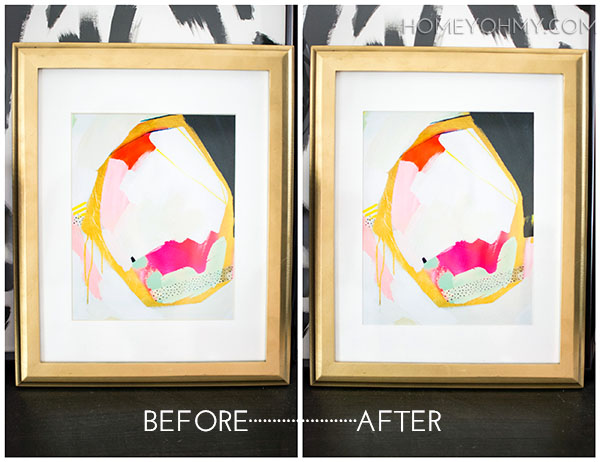
The difference is more subtle with this one, but still absolutely necessary in my world. You see how there’s that extra bit of pink that’s more visible on the right side now? Worth it.
I do agree before and afters are more exciting the more dramatic they are though, so here’s that original one again.
 Wabam! Huge.
I’m slowly but surely framing and cutting away at more prints, and still making some more decisions about what I’m doing, because I don’t know anymore. Sounds promising, I know. This post is a bit of an update on the wall, though! Do you like these prints? I’m sure of them being a part of the gallery because I’ve had my eye on them for so long and LOVE them. If you were wondering on the sources, you can find the Wild Stripes print here and the Navy Geo print here.



Would love to see a pic of the wall so far! I think taking the time to pick out stuff you really love is the way to go. And changing these frames to exactly how you like is awesome.
Trust me, the wall so far is non-existent haha! I’ve got the art piling up in a corner and cannot wait until I start hanging them up! Thanks for agreeing with me that it’s worth the extra centimeters of trimming to get the art framed just the way I want <3
This little trick makes SUCH a difference. Art is made to be seen not covered up and I couldn’t agree with you more. So excited to see your gallery wall!
YES, girl. I’m sure you know firsthand with all your fab freebies that it would be more than wack to pair them with a mat that covered the words, ha!
I am in the process of trying to make a gallery wall myself (a LOT harder than it looks, folks!) so these tips were super helpful!! Especially when you buy frames in bulk when Michael’s craft store is having a sale… and you need to change the matting lol. Thanks for sharing!
Isn’t it?? I think it’s especially harder if you don’t already have all the art to begin with. And I totally take advantage of frame sales at Michaels, too!
Wow, that makes a huge difference!!
-Marianela
Glad you agree, Marianela!
The after frame is definitely more badass! I love the art you’ve picked out so far… excited for the big reveal!
NICE. I knew you’d have my back <3 Thanks Fran!
They look so much better with the mats trimmed! I had such anxiety about cutting mats/using my x-acto knife when I was in college, but I was forced to overcome it preparing my senior portfolio— now it feels good to be an old pro. :)
Can’t wait to see your gallery wall— I’m still in the procrastination/indecisive dreaming up phase for adding a gallery wall to our living room!
Thanks, Michelle! Feels like I’m never going to escape this indecisive dreaming up phase. It’s seriously a lot harder than I thought it would be! Wish I had started to kick into gear on this sooner :P
My absolute favorite way to cut matting is what’s called a “weighted mat”, which just means that the bottom is bigger than the top. However, I like it my way – which means the top, left and right are all the same, and the bottom is wider. It’s very aesthetically pleasing to use weighted mats because your eyes shift the work down anyways. The evenness of the other sides? That’s all me :)
Ooooh, yes, I know what you’re talking about. I agree, weighted mats look so interesting, and I didn’t realize our eyes automatically shift the art down. Very cool, and thanks for the great info!
Of course! I used to cut mats at work every day. My most impressive one had six holes in one mat, alternating portrait and landscape. That was a doozey.
Amy I love your blog!!!
Aw Kathy!! Thank you!!!!
Great tip! I think I need one of those rotary cutters in my life now…
You really do. I genuinely believe that everyone has or will find a good use for it!
Totally makes a HUGE difference!